Kubernetes
From Kubernetes Dashboard to Headlamp: Understanding the Transition
For many people, Kubernetes Dashboard was their first window into Kubernetes. It offered a simple visual way to see what was running in a cluster, inspect resources, and build confidence without relying on the command line. For years, it helped developers, students, and operators make sense of Kubernetes, and it served as an important onramp into the ecosystem.
The Kubernetes Dashboard project has now been archived. We deeply respect the work the team did and the role Dashboard played in making Kubernetes more approachable for so many users.
Headlamp builds on that foundation and carries it forward. It keeps the clarity of a visual interface while adding capabilities that match how Kubernetes is used today. This includes multi-cluster visibility, application-centric views, extensibility through plugins, and flexible deployment options that work both in-cluster and on the desktop.
This guide is meant to help you navigate that transition with confidence. Before diving into the mechanics of migration, we start with familiar ground by looking at how common Kubernetes Dashboard workflows map to Headlamp. We also cover what stays the same and what improves after the switch. The goal is not just to replace a tool, but to honor a user-centered legacy and help you land in a UI that can grow with you as your Kubernetes usage evolves.
Mapping Kubernetes Dashboard workloads to Headlamp
If you have used Kubernetes Dashboard before, many workflows in Headlamp will feel familiar. Headlamp does not introduce a new way of thinking. Instead, it builds on workloads users already know and extends them in practical ways. The focus is continuity. What worked before still works, with more room to grow.
Viewing workloads and resources
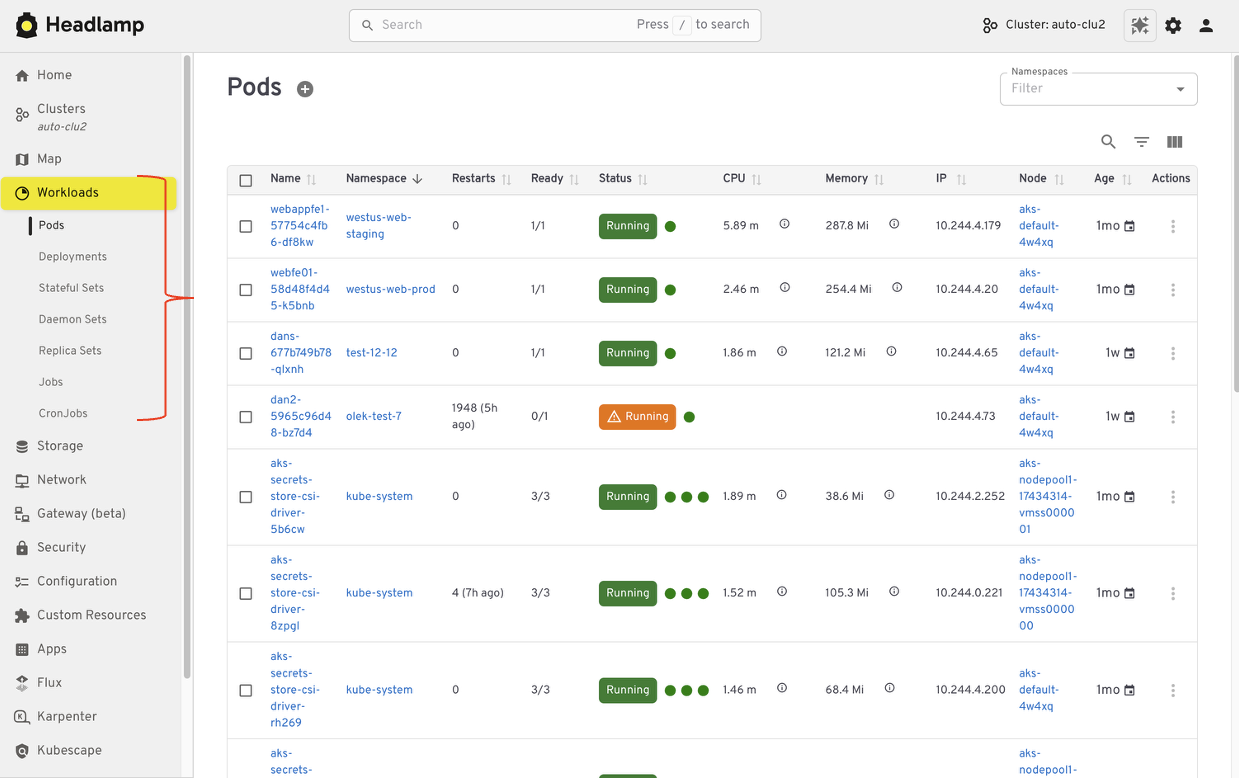
In Kubernetes Dashboard, most users started by browsing workloads like pods, deployments, services, and namespaces. Headlamp keeps this same starting point. Workloads are easy to find and inspect, and moving between namespaces and clusters is simpler. Resources are still organized in familiar ways, and navigation feels smoother, especially when you work across multiple environments.
Editing and interacting with resources
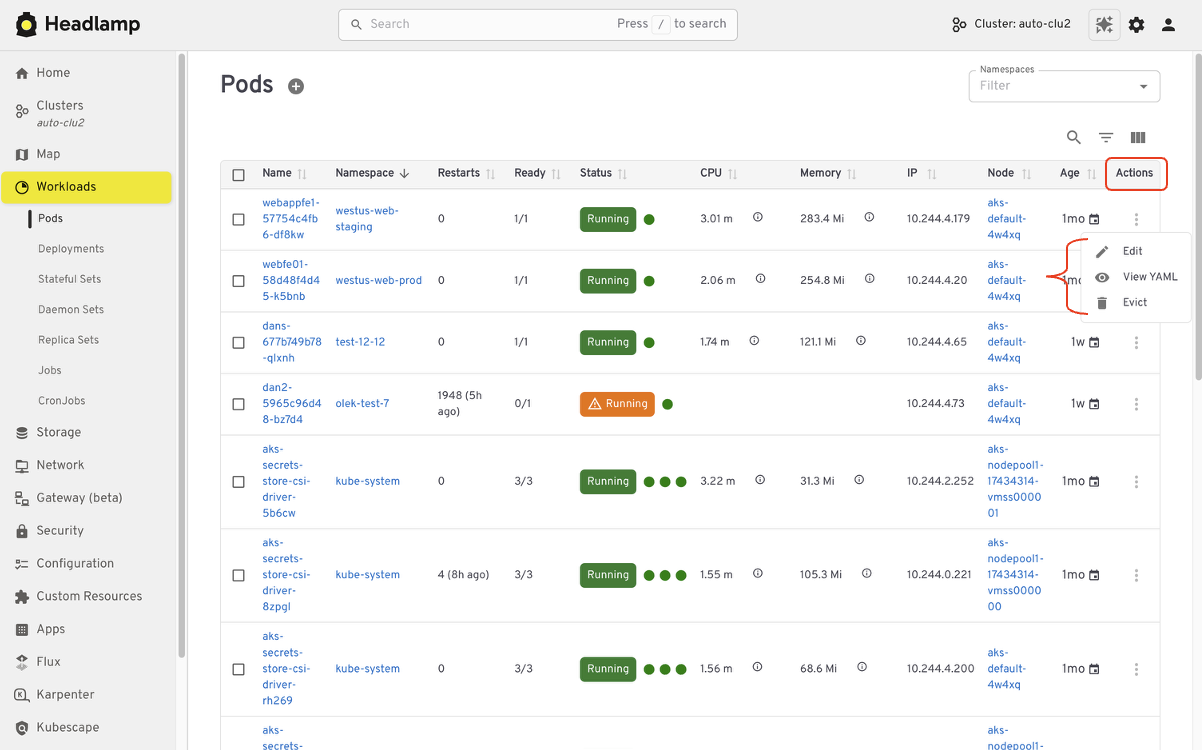
Like Kubernetes Dashboard, Headlamp lets you view and edit manifests directly in the UI based on your permissions. You can delete resources, scale workloads, or update configurations from the interface. All actions follow standard Kubernetes RBAC. If you could perform an action in Dashboard, you will find the same capability in Headlamp, with the same respect for access controls.
Understanding relationships
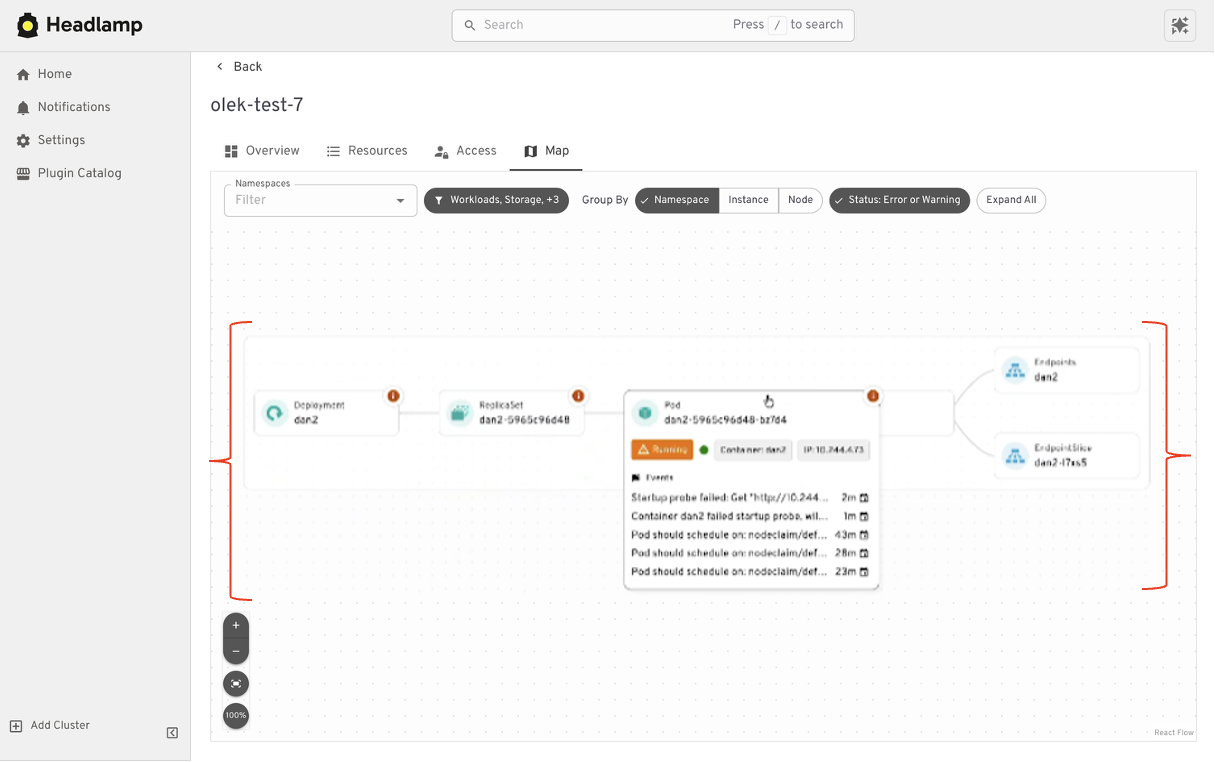
Where Headlamp begins to expand the experience is in how it presents relationships between resources. In addition to list views, Headlamp offers visual ways to see how workloads, services, and configurations connect. This helps provide context without changing the underlying workloads users already rely on.
At a high level, the tasks you performed in Kubernetes Dashboard are still there. Headlamp keeps familiar workflows while making it easier to scale as clusters, teams, and applications grow.
Where Headlamp goes beyond Kubernetes Dashboard
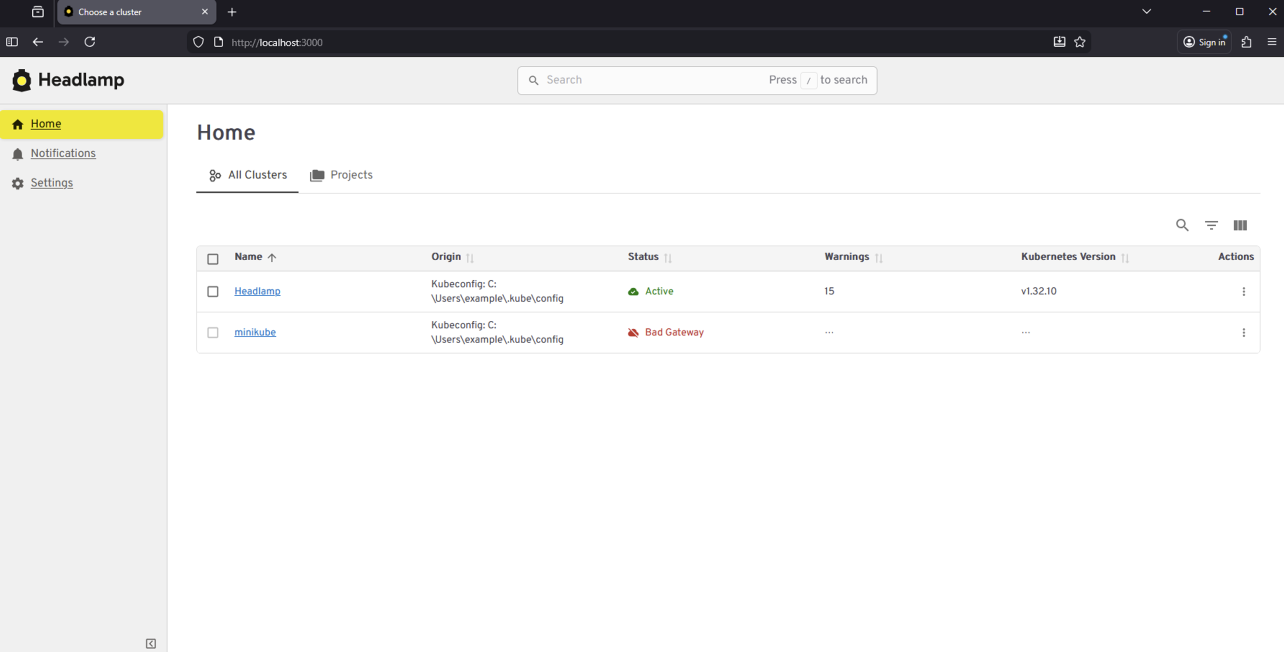
Expanding from single cluster to multi-cluster workflows
Kubernetes Dashboard was designed to work with one cluster at a time. That model worked well for simple setups, but it became limiting as teams adopted multiple environments. Headlamp expands this view by letting you work with multiple clusters from a single interface without switching tools or losing context. This makes it easier to manage development, staging, and production environments side by side.
For teams running Kubernetes in more than one place, this shift reduces friction. You can stay oriented and move between clusters with confidence.
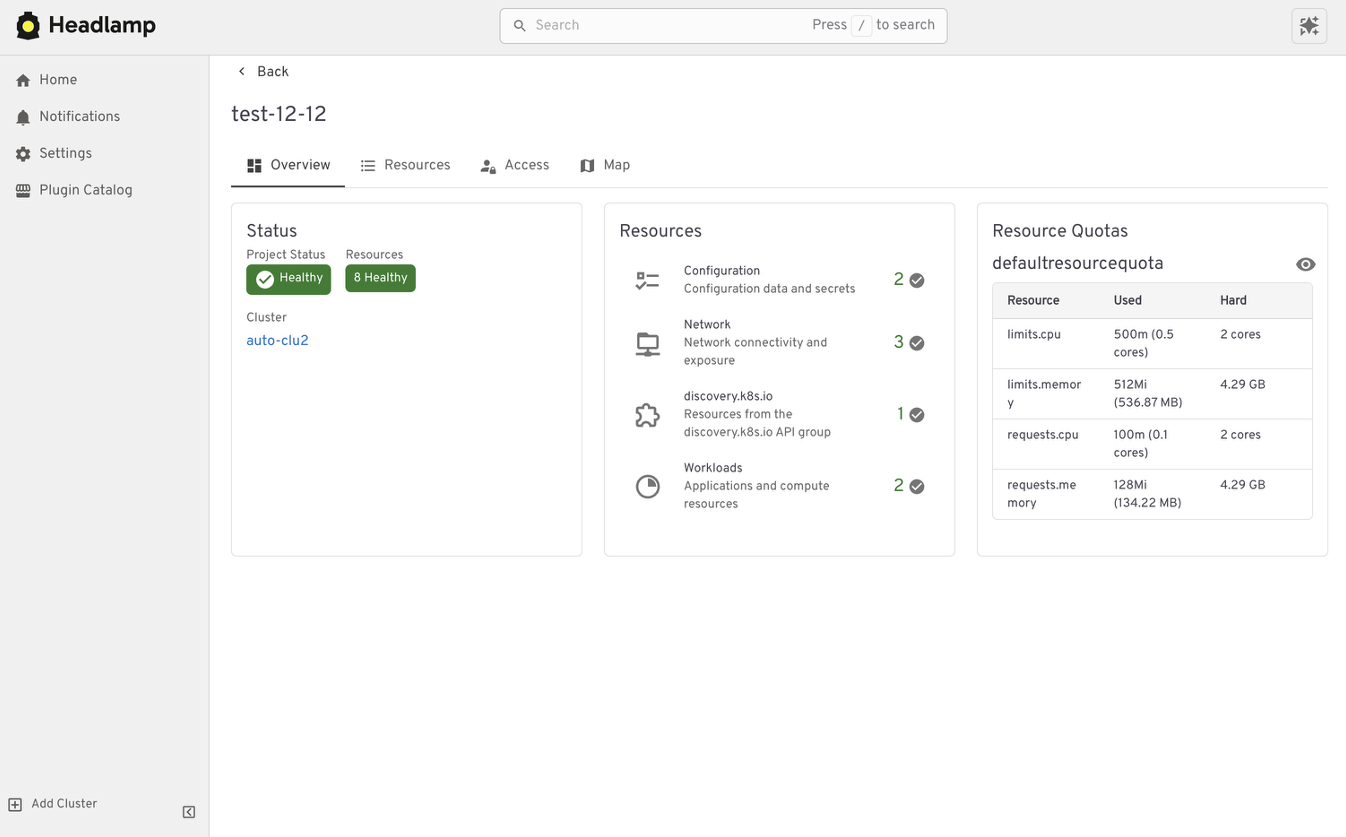
From resource lists to application context with Projects
Projects give you an application-centered way to view Kubernetes. Instead of jumping between lists, you can group related workloads, services, and supporting resources in one place. This makes applications easier to understand. You can see what belongs together, track changes in context, and troubleshoot without scanning the cluster piece by piece.
Projects are built on native Kubernetes concepts. Namespaces, labels, and RBAC continue to work the same way they always have. Headlamp adds a visual layer that brings related resources together.
Projects are optional. You can still work at the individual resource level when that fits your task. When you need more context, Projects help you step back and see the bigger picture.
Extend the Headlamp UI with plugins
Headlamp can be extended through plugins that bring common workflows directly into the UI. Instead of switching tools, you work in one place with the same context.
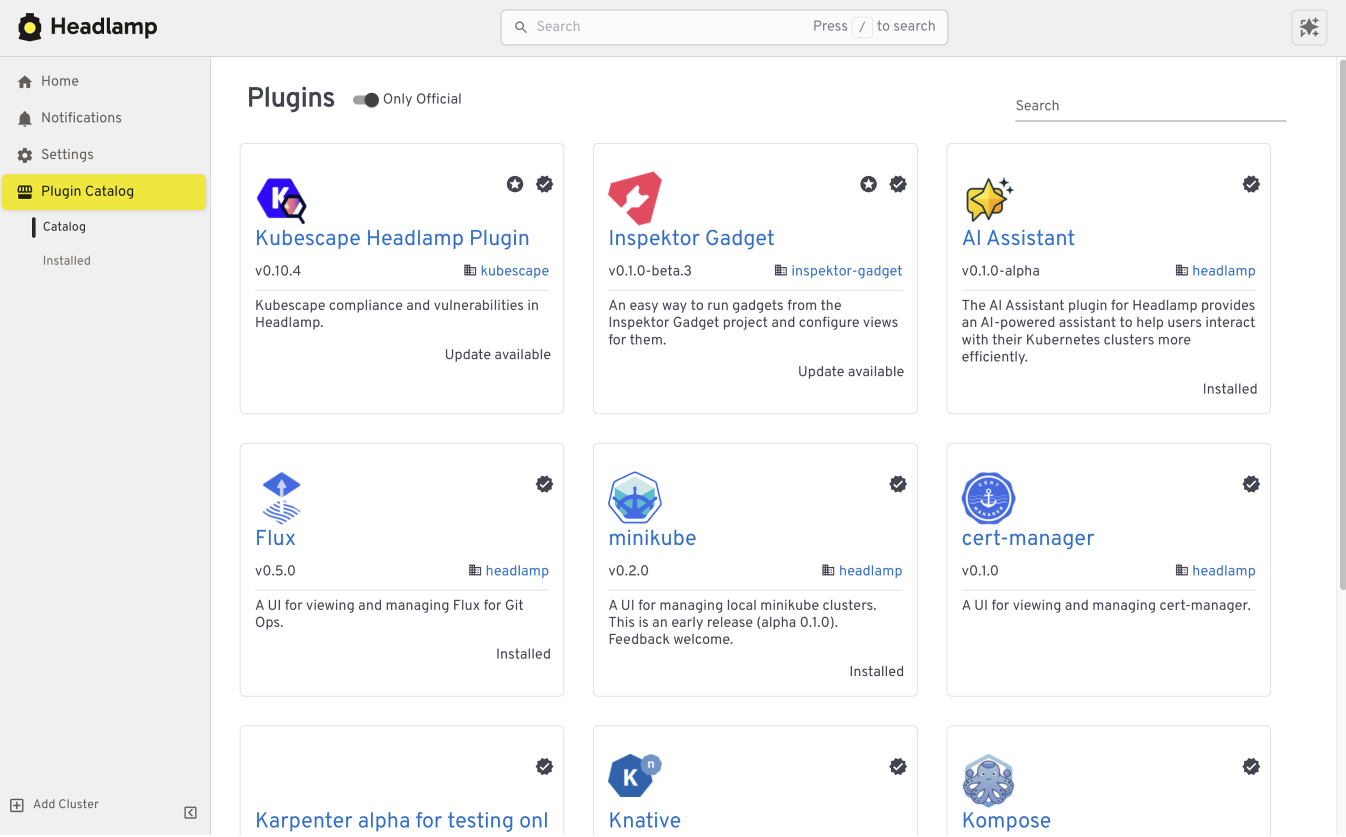
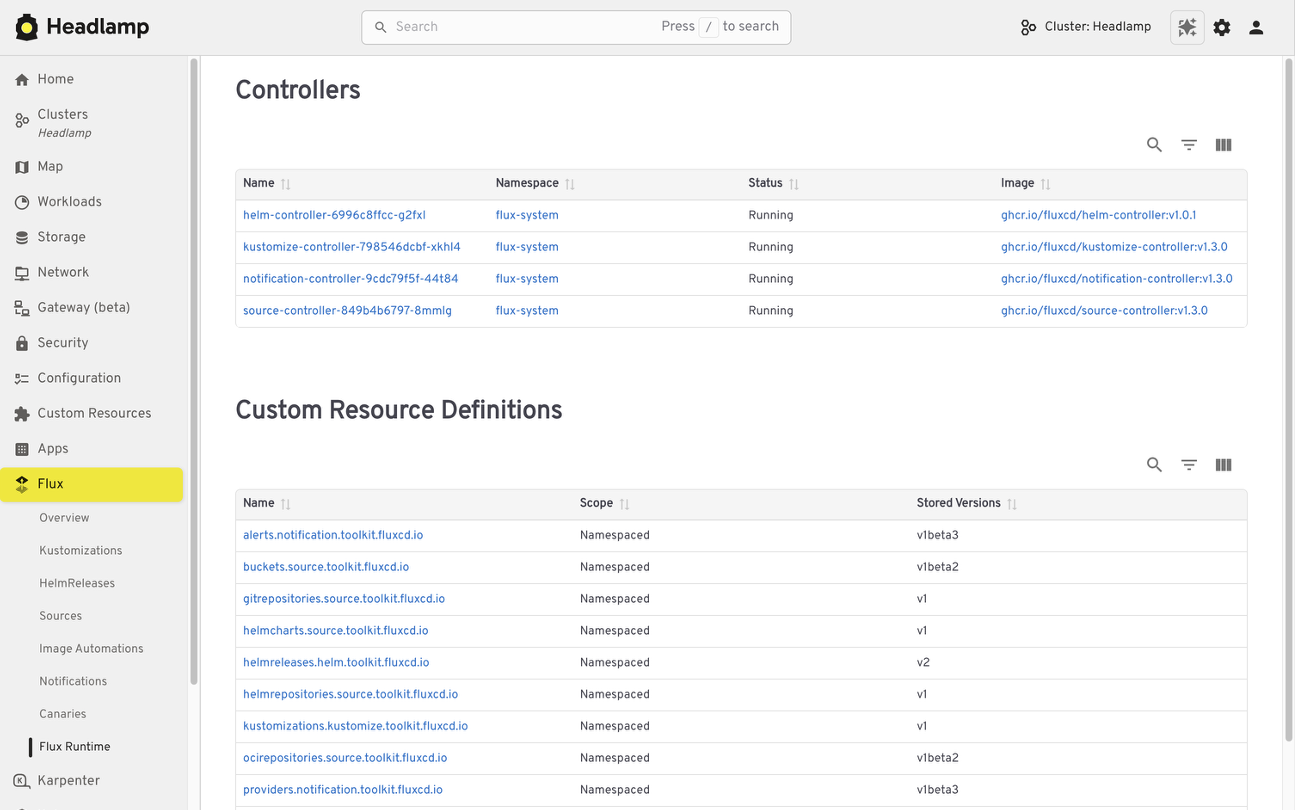
For example, the Flux plugin brings GitOps workflows into Headlamp. It allows teams to view application state alongside the Kubernetes resources that Flux manages, making it easier to understand how changes in Git relate to what is running in the cluster.
The AI Assistant follows a similar pattern. It adds a conversational layer to the UI that helps users understand what they are seeing, troubleshoot issues, or take action. All of this happens in the same screen where the problem appears.

Building your own plugins
Plugins are optional and not limited to community-built extensions. Platform and project teams can also create their own plugins. This allows organizations to add custom integrations that match their specific workflows and internal tooling, while keeping the user experience consistent.
Choosing how and where Headlamp runs
Headlamp gives teams flexibility in how they use a Kubernetes UI. You can run it directly in a cluster, use it as a desktop application, or combine both approaches based on your needs.
Running Headlamp in-cluster works well for shared environments. It provides a centrally managed UI with controlled access and fits naturally into Kubernetes setups, following the same authentication and RBAC rules as other in-cluster components.
The desktop application is often a better fit for local development and onboarding. It also works well when you need to manage multiple clusters from one place. Users can connect using their existing kubeconfig without deploying anything into the cluster.
These options are not mutually exclusive. Many teams use the desktop app for day-to-day work, while relying on an in-cluster deployment for shared or production environments.
Preparing for the Migration
Before moving from Kubernetes Dashboard to Headlamp, it can be helpful to pause and take stock of how you use the Dashboard today. A little reflection up front can go a long way toward making the transition feel smooth and familiar.
Start by noting which clusters and namespaces you access and how authentication works. Headlamp relies on standard Kubernetes authentication and RBAC. In most cases, existing access models carry over without change. If users already connect using kubeconfig files or service accounts, they will be able to access the same resources in Headlamp.
It is also useful to think about the workflows that matter most to your team. Some users rely on Dashboard for quick inspection or troubleshooting, while others use it for lightweight edits or validation. Headlamp supports these same workflows and adds optional capabilities on top. Knowing what you rely on today helps the transition feel predictable and confidence building.
If you would like to explore Headlamp or try it out before migrating, you can learn more at headlamp.dev.
This blog focused on understanding the transition and what to expect. A step by step migration guide is coming soon and will walk through installation and migration in detail.
Security Notice: Former Helm APT Mirror Domain `baltocdn.com` Statement
The Helm Security Team has received third-party reports that the ownership on the former community-maintained Debian/Ubuntu APT mirror domain, baltocdn.com, has changed after baltocdn.com's original registration lapsed.
And as a result, the new owners may be using the domain to serve malicious content.
We are publishing this notice to raise awareness for Helm users who may still have the configuration of their APT package manager referencing baltocdn.com.
baltocdn.com was previously used as the APT mirror for Helm distribution for many years, but it is no longer a Helm APT mirror, and must not be used to manage Helm.
Summary
The former Helm APT mirror domain baltocdn.com was decommissioned in September 2025.
Since decommissioning, attempts to access or download Helm packages from baltocdn.com should have failed due to the underlying serving infrastructure having been shut down.
The domain registration for baltocdn.com later expired and the domain was re-registered by a third party on May 19, 2026. As a result, users, systems, or automation still attempting to download Helm packages from baltocdn.com could be directed to content controlled by the new domain registrant.
At this time, the Helm Security Team has received third-party reports that the domain may have been repurposed to serve malicious content. We have not independently confirmed those reports. However, as the domain is no longer controlled by the previous APT repository operator and is no longer a Helm distribution endpoint, any continued use of baltocdn.com represents a potential supply chain risk.
Affected users
You may be affected if any Debian or Ubuntu based systems, APT repositories, CI jobs, container images, installation scripts, bootstrap scripts, configuration management templates, or internal documentation still reference:
baltocdn.com
Any user who executed binaries sourced from baltocdn.com after May 19, 2026 should consider the affected system compromised and follow their normal incident response procedures.
Users who have legacy references to baltocdn.com but have not attempted to install or update Helm from that domain after May 19, 2026 should still remove those references immediately using the steps below.
Remediation
Please ensure that all Debian/Ubuntu APT-based Helm installations use the current APT repository:
https://packages.buildkite.com/helm-linux/helm-debian
Review your systems and repositories for any remaining references to baltocdn.com and replace them with the current installation instructions.
The current Helm APT installation instructions are available at the link below:
https://helm.sh/docs/intro/install/#from-apt-debianubuntu
Recommended actions:
- Remove any APT source entries that reference
baltocdn.com. - Update Debian/Ubuntu APT-based Helm installation configuration to use
packages.buildkite.com. - Review CI/CD pipelines, Dockerfiles, bootstrap scripts, configuration management, and internal documentation for legacy references.
- Treat any system that executed binaries sourced from
baltocdn.comafter May 19, 2026 as potentially compromised. - Follow your organization’s incident response process if you believe a system may have downloaded or executed content from the repurposed domain.
- Disable access (corporate proxy/firewall, etc) to
baltocdn.com. Since the site was previously decommissioned and no longer serving content related to the Helm project, limiting access will not break existing workflows.
About the Helm APT repository
The Helm Debian/Ubuntu APT repository (and its baltocdn.com predecessor) is gratefully community maintained. It is not directly supported by the Helm maintainers.
The Helm project provides official methods for installing Helm from binary releases and from the Helm install script. Community-provided package manager installation methods, including APT, are documented for user convenience but are not directly supported by the Helm project.
Engage with the Helm Community
The Helm project provides multiple ways to interact with the community which include Slack channels and the weekly developers meeting. Members of the Helm security team and maintainers are present within these forums and, along with the rest of the community, can address questions or concerns related to Helm related topics.
Reporting security concerns
For more information about reporting security concerns associated with the Helm project, please see the Helm Security Process and Policy documentation:
https://helm.sh/community/security/
Conclusion
baltocdn.com is no longer a Helm APT mirror and should not be used to install and manage Helm.
Users should migrate any remaining Debian/Ubuntu APT-based Helm installation configuration to packages.buildkite.com and review their environments for legacy references to the former domain to mitigate potential security concerns.
Kubernetes 1.36, with Ryota Sawada
Ryota Sawada is software engineer at Numtide and the release lead of Kubernetes 1.36 code name Haru. He has over a decade of experience mainly in the finance industry including working on Cloud Native technologies, and outside of Cloud Native, he's been tinkering with Emacs and Nix.
Do you have something cool to share? Some questions? Let us know:
- web: kubernetespodcast.com
- mail: [email protected]
- twitter: @kubernetespod
- bluesky: @kubernetespodcast.com
News of the week Links from the interview
Reconciling the Past: Correcting Records for Unfixed Kubernetes CVEs
The Kubernetes project relies on transparency to empower cluster administrators and security researchers. One important way we do that is by publishing CVE records into the Common Vulnerabilities and Exposures database. As part of our ongoing effort to mature the official Kubernetes CVE Feed, we have identified some discrepancies. CVE records for a few older, unfixed issues incorrectly include a fixed version field.
The Kubernetes Security Response Committee (SRC) will correct the affected CVE records on June 1, 2026. This may result in vulnerability scanners identifying these vulnerabilities in places where they were previously not detected.
To help reduce confusion, this post provides a technical update on three vulnerabilities that were disclosed in previous years but remain unfixed: CVE-2020-8561, CVE-2020-8562, and CVE-2021-25740.
Why we are updating these records now
While these vulnerabilities have been public for several years, the recent work to generate official Open Source Vulnerabilities (OSV) files revealed that their corresponding CVE records did not accurately reflect their status. Specifically, some records suggested a fixed version existed, when in reality, these issues are architectural design trade-offs that cannot be fully remediated through code without breaking fundamental Kubernetes functionality.
Correcting these records is vital for the community for:
- Automation Fidelity: Modern vulnerability scanners depend on precise version ranges. Inaccurate fixed tags lead to false negatives, giving users a false sense of security.
- Risk Documentation: By formalizing these as unfixed, we ensure that platform providers and administrators are aware of the persistent need for administrative mitigations.
For completeness, we should also mention that CVE-2020-8554 is an unfixed CVE with a correct CVE record stating that it affects all versions. That record will also be updated to use a more-standardized version number format.
Technical analysis of unfixed architectural risks
The following vulnerabilities will not be fixed by the Kubernetes project. GitHub issues remain the best reference for the technical mechanics of these flaws.
CVE-2020-8561: Webhook redirect in kube-apiserver
- Severity: Medium (4.1).
- The Issue: The kube-apiserver follows HTTP redirects when communicating with admission webhooks. An actor capable of configuring an AdmissionWebhookConfiguration can redirect API server requests to internal, private networks.
- Why it remains unfixed: Restricting this behavior would require breaking the standard HTTP client behavior that many legitimate integrations rely on.
- Mitigation: Set the API server log level to less than 10 (to prevent logging response bodies) and disable
dynamic profiling (
--profiling=false) to prevent unauthorized log-level changes.
CVE-2020-8562: Proxy bypass via DNS TOCTOU
- Severity: Low (3.1).
- The Issue: A Time-of-Check to Time-of-Use (TOCTOU) race condition in the API server proxy allows users to bypass IP restrictions. The system performs a DNS check to validate an IP, but then performs a second resolution for the actual connection, which an attacker can manipulate.
- Why it remains unfixed: Fixing this requires pinning resolved IPs in a way that breaks complex split-horizon DNS or dynamic IP environments.
- Mitigation: Use a local DNS caching server like dnsmasq for the API server and configure
min-cache-ttlto enforce consistent responses between the check and the connection.
CVE-2021-25740: Cross-namespace forwarding via Endpoints
- Severity: Low (3.1).
- The Issue: A design flaw in the Endpoints and EndpointSlice API objects allows users to manually specify IP addresses, which can be used to point a LoadBalancer or Ingress toward backends in other namespaces.
- Why it remains unfixed: This is a fundamental feature of the Endpoints API used by many networking tools and operators.
- Mitigation: Restrict write access to Endpoints (legacy) and EndpointSlices. Since Kubernetes 1.22,
Kubernetes RBAC authorization mode no longer includes those permissions in the default edit and admin
ClusterRoles. That removal applies to clusters created using Kubernetes v1.22; for clusters upgraded from
older versions, administrators should manually audit and reconcile the
system:aggregate-to-editClusterRole.
Note:
On June 1, 2026, these CVE records will be updated to correctly reflect the fact that all versions are affected. You may see them begin to appear in vulnerability scanner results.Required actions for administrators
The Kubernetes project recommends a secure by configuration approach to manage these persistent risks:
Vulnerability Action item Severity score (Rating) Command / configuration CVE-2020-8561 Restrict Log Verbosity 4.1 (Medium) Ensure--v is set to < 10 and --profiling=false.
CVE-2020-8562
Enforce DNS Consistency
3.1 (Low)
Deploy dnsmasq or a similar caching resolver on control plane nodes.
CVE-2021-25740
Hardened RBAC
3.1 (Low)
kubectl auth reconcile to remove Endpoints write access from broad roles.
The RBAC action for CVE-2021-25740 applies when your cluster uses RBAC authorization mode, which is the default for clusters created with standard Kubernetes tooling. Administrators should independently test and validate these configurations in a non-production environment, assessing the architectural risks against their specific threat model and risk tolerance.
Conclusion: maturity through transparency
The effort to reconcile these records is a sign of a maturing security ecosystem. By moving away from the "patch-only" mindset and accurately documenting architectural debt, the Kubernetes project provides the community with the high-fidelity data needed to secure modern cloud native infrastructure.
We would like to thank the security researchers—QiQi Xu, Javier Provecho, and others—who identified these risks, and the SIG Security Tooling contributors who continue to refine our official feeds. Special shoutout to Rory McCune for sharing information around these CVEs through his blog posts.
Announcing etcd 3.7.0-beta.0
SIG-Etcd announces the availability of the first beta release of etcd v3.7.0. This new version of the popular distributed database and key Kubernetes component includes the long-requested RangeStream feature, as well as a refactoring and cleanup of multiple legacy components and interfaces. v3.7 will deliver improved security, better operational reliability, and an improved experience for working with large resultsets.
First, however, the project needs users to test the beta. You can find v3.7.0-beta.0 here:
Please try it out and report issues in the etcd repo.
This beta also determines the EOL of version 3.4.
RangeStream
In etcd v3.6 and earlier, it is challenging to work with requests that return large resultsets. The client or requesting application is forced to wait for the full result set, leading to unpredictable latency and memory usage. The RangeStream RPC lets calling applications accept result sets in chunks, reducing latency and making buffering memory usage more predictable.
Much of the work on RangeStream was done by a relatively new contributor to etcd, Jeffrey Ying, a software engineer at Google. New contributors can have a substantial impact on etcd development.
"I've always been fascinated by database internals, and building RangeStream was a great opportunity to solve a bottleneck we were hitting in production with Kubernetes. It was the perfect opportunity to collaborate across projects and improve the ecosystem as a whole. Jumping into etcd as a new contributor had a bit of a learning curve, but the community is incredibly welcoming. The leads were very receptive to my ideas and helped me iterate quickly, while maintaining the project's high bar for reliability and code quality," said Jeffrey.
Instructions on how to use RangeStream in gRPC calls and in etcdctl can be found in the etcd documentation. Users should try it out for their own applications.
Removal of v2store
The last vestiges of etcd v2store have been removed in v3.7, making this the first release that is 100% on v3store. This includes discovery, bootstrap, v2 requests, and the v2 client. Our team has also removed multiple deprecated experimental flags.
All of these changes may create some breakage for users, particularly those who have not already updated to v3.6.11. We are interested in hearing about blockers encountered by users and dependent applications; please report anything you find that can't be remedied or needs better upgrade documentation.
etcd v3.7.0-beta.0 also includes bbolt v1.5.0 and raft v3.7.0.
3.4 EOL
According to our community support policy, we typically maintain only the latest two minor versions, currently v3.6 and v3.5. Etcd v3.5 will be supported for 1 year after v3.7.0 final release.
As mentioned in extended support for v3.4 in the etcd v3.6.0 release announcement, etcd v3.4 has been EOL since May 15, 2026. SIG-etcd may release one more security patch for that version at the end of May, if warranted by patched vulnerabilities. In any case, it will cease being updated after the end of May. Users on v3.4 should be planning to upgrade their clusters.
Feedback and Future Betas
Reach the etcd contributors with your feedback about v3.7.0-beta.0 in any of the following places:
SIG-etcd may release additional betas of version v3.7.0 with additional refactoring, particularly of our use of protobuf libraries. Release candidates and the final release will probably happen through June, possibly into early July.
Kubelet Metrics: How cAdvisor and CRI Collect Kubernetes Stats
Kubernetes v1.36: New Metric for Route Sync in the Cloud Controller Manager
This article was originally published with the wrong date. It was later republished, dated the 15th of May 2026.
Kubernetes v1.36 introduces a new alpha counter metric route_controller_route_sync_total
to the Cloud Controller Manager (CCM) route controller implementation at
k8s.io/cloud-provider. This metric
increments each time routes are synced with the cloud provider.
A/B testing watch-based route reconciliation
This metric was added to help operators validate the
CloudControllerManagerWatchBasedRoutesReconciliation feature gate introduced in
Kubernetes v1.35.
That feature gate switches the route controller from a fixed-interval loop to a watch-based
approach that only reconciles when nodes actually change. This reduces unnecessary API calls
to the infrastructure provider, lowering pressure on rate-limited APIs and allowing operators
to make more efficient use of their available quota.
To A/B test this, compare route_controller_route_sync_total with the feature gate
disabled (default) versus enabled. In clusters where node changes are infrequent, you should
see a significant drop in the sync rate with the feature gate turned on.
Example: expected behavior
With the feature gate disabled (the default fixed-interval loop), the counter increments steadily regardless of whether any node changes occurred:
# After 10 minutes with no node changes
route_controller_route_sync_total 60
# After 20 minutes, still no node changes
route_controller_route_sync_total 120
With the feature gate enabled (watch-based reconciliation), the counter only increments when nodes are actually added, removed, or updated:
# After 10 minutes with no node changes
route_controller_route_sync_total 1
# After 20 minutes, still no node changes — counter unchanged
route_controller_route_sync_total 1
# A new node joins the cluster — counter increments
route_controller_route_sync_total 2
The difference is especially visible in stable clusters where nodes rarely change.
Where can I give feedback?
If you have feedback, feel free to reach out through any of the following channels:
- The #sig-cloud-provider channel on Kubernetes Slack
- The KEP-5237 issue on GitHub
- The SIG Cloud Provider community page for other communication channels
How can I learn more?
For more details, refer to KEP-5237.
Kubernetes v1.36: Mixed Version Proxy Graduates to Beta
Back in Kubernetes 1.28, we introduced the Mixed Version Proxy (MVP) as an Alpha feature (under the feature gate UnknownVersionInteroperabilityProxy) in a previous blog post. The goal was simple but critical: make cluster upgrades safer by ensuring that requests for resources not yet known to an older API server are correctly routed to a newer peer API server, instead of returning an incorrect 404 Not Found.
We are excited to announce that the Mixed Version Proxy is moving to Beta in Kubernetes 1.36 and will be enabled by default! The feature has evolved significantly since its initial release, addressing key gaps and modernizing its architecture.
Here is a look at how the feature has evolved and what you need to know to leverage it in your clusters.
What problem are we solving?
In a highly available control plane undergoing an upgrade, you often have API servers running different versions. These servers might serve different sets of APIs (Groups, Versions, Resources).
Without MVP, if a client request lands on an API server that does not serve the requested resource (e.g., a new API version introduced in the upgrade), that server returns a 404 Not Found. This is technically incorrect because the resource is available in the cluster, just not on that specific server. This can lead to serious side effects, such as mistaken garbage collection or blocked namespace deletions.
MVP solves this by proxying the request to a peer API server that can serve it.
How has it evolved since 1.28
The initial Alpha implementation was a great proof of concept, but it had some limitations and relied on older mechanisms. Here is how we have modernized it for Beta:
-
From StorageVersion API to Aggregated Discovery In the Alpha version, API servers relied on the
StorageVersion APIto figure out which peers served which resources. While functional, this approach had a significant limitation: theStorageVersion APIis not yet supported for CRDs and aggregated APIs. For Beta, we have replaced the reliance onStorageVersion APIcalls with the use ofAggregated Discovery. API servers now use the aggregated discovery data to dynamically understand the capabilities of their peers. -
The Missing Piece: Peer-Aggregated Discovery The 1.28 blog post noted a significant gap: while we could proxy resource requests, discovery requests still only showed what the local API server knew about. In 1.36, we have added
Peer-Aggregated Discoverysupport! Now, when a client performs discovery (e.g., listing available APIs), the API server merges its local view with the discovery data from all active peers. This provides clients with a complete, unified view of all APIs available across the entire cluster, regardless of which API server they connected to.
While peer-aggregated discovery will be the default behavior (note that peer-aggregated discovery is enabled if the --peer-ca-file flag is set, otherwise the server will fallback to showing only its local APIs), there may be cases where you need to inspect only the resources served by the specific API server you are connected to. You can request this non-aggregated view by including the profile=nopeer parameter in your request's Accept header (e.g., Accept: application/json;g=apidiscovery.k8s.io;v=v2;as=APIGroupDiscoveryList;profile=nopeer).
Required configuration
While the feature gate will be enabled by default, it requires certain flags to be set to allow for secure communication between peer API servers. To function correctly, make sure your API server is configured with the following flags:
--feature-gates=UnknownVersionInteroperabilityProxy=true: This will be default in 1.36, but it is good to verify--peer-ca-file=<path-to-ca>: [CRITICAL] This is a required flag. You must provide the CA bundle that the source API server will use to authenticate the serving certificates of destination peer API servers. Without this, proxying will fail due to TLS verification errors.--peer-advertise-ipand--peer-advertise-port: These flags are used to set the network address that peers should use to reach this API server. If unset, the values from--advertise-addressor--bind-addressare used. If you have complex network topologies where API servers communicate over a specific internal interface, setting these flags explicitly is highly recommended.
Configuring with kubeadm
If you manage your cluster with kubeadm, you can configure these flags in your ClusterConfiguration file:
apiVersion: kubeadm.k8s.io/v1beta4
kind: ClusterConfiguration
apiServer:
 extraArgs:
 peer-ca-file: "/etc/kubernetes/pki/ca.crt"
 # peer-advertise-ip and port if needed
Call to action
If you are running multi-master clusters and upgrading them regularly, the Mixed Version Proxy is a major safety improvement. With it becoming default in 1.36, we encourage you to:
- Review your API server flags to ensure
--peer-ca-fileis set properly. - Test the feature in your staging environments as you prepare for the 1.36 upgrade.
- Provide feedback to SIG API Machinery (Slack, mailing list, or by attending SIG API Machinery meetings) on your experience.
Kubernetes v1.36: Deprecation and removal of Service ExternalIPs
The .spec.externalIPs field for Service was an early attempt to provide
cloud-load-balancer-like functionality for non-cloud clusters.
Unfortunately, the API assumes that every user in the cluster is fully
trusted, and in any situation where that is not the case, it enables
various security exploits, as described in
CVE-2020-8554.
Since Kubernetes 1.21, the Kubernetes project has recommended that all users disable
.spec.externalIPs. To make that easier, Kubernetes also added an admission controller
(DenyServiceExternalIPs) that can be enabled to do this. At the time,
SIG Network felt that blocking the functionality by default was too large a
breaking change to consider.
However, the security problems are still there, and as a project we're increasingly unhappy with the "insecure by default" state of the feature. Additionally, there are now several better alternatives for non-cloud clusters wanting load-balancer-like functionality.
As a result, the .spec.externalIPs field for Service is now formally deprecated in Kubernetes 1.36.
We expect that a future minor release of Kubernetes will drop
implementation of the behavior from kube-proxy, and will update the
Kubernetes conformance criteria to require that conforming implementations
do not provide support.
A note on terminology, and what hasn't been deprecated
The phrase external IP is somewhat overloaded in Kubernetes:
-
The Service API has a field
.spec.externalIPsthat can be used to add additional IP addresses that a Service will respond on. -
The Node API's
.status.addressesfield can list addresses of several different types, one of which is calledExternalIP. -
The
kubectltool, when displaying information about a Service of type LoadBalancer in the default output format, will show the load balancer IP address under the column headingEXTERNAL-IP.
This deprecation is about the first of those. If you are not setting
the field externalIPs in any of your Services, then it does not
apply to you.
That said, as a precaution, you may still want to enable the DenyServiceExternalIPs admission controller to
block any future use of the externalIPs field.
Alternatives to externalIPs
If you are using .spec.externalIPs, then there are several alternatives.
Consider a Service like the following:
apiVersion: v1
kind: Service
metadata:
 name: my-example-service
spec:
 type: ClusterIP
 selector:
 app.kubernetes.io/name: my-example-app
 ports:
 - protocol: TCP
 port: 80
 targetPort: 8080
 externalIPs:
 - "192.0.2.4"
Using manually-managed LoadBalancer Services instead of externalIPs
The easiest (but also worst) option is to just switch from using
externalIPs to using a type: LoadBalancer service, and assigning a
load balancer IP by hand. This is, essentially, exactly the same as
externalIPs, with one important difference: the load balancer IP is
part of the Service's .status, not its .spec, and in a cluster
with RBAC enabled, it can't be edited by ordinary users by default.
Thus, this replacement for externalIPs would only be available to
users who were given permission by the admins (although those users
would then be fully empowered to replicate CVE-2020-8554; there would
still not be any further checks to ensure that one user wasn't
stealing another user's IPs, etc.)
Because of the way that .status works in Kubernetes, you must create the
Service without a load balancer IP, and then add the IP as a second step:
$ cat loadbalancer-service.yaml
apiVersion: v1
kind: Service
metadata:
 name: my-example-service
spec:
 # prevent any real load balancer controllers from managing this service
 # by using a non-existent loadBalancerClass
 loadBalancerClass: non-existent-class
 type: LoadBalancer
 selector:
 app.kubernetes.io/name: my-example-app
 ports:
 - protocol: TCP
 port: 80
 targetPort: 8080
$ kubectl apply -f loadbalancer-service.yaml
service/my-example-service created
$ kubectl patch service my-example-service --subresource=status --type=merge -p '{"status":{"loadBalancer":{"ingress":[{"ip":"192.0.2.4"}]}}}'
Using a non-cloud based load balancer controller
Although LoadBalancer services were originally designed to be backed by
cloud load balancers, Kubernetes can also support them on non-cloud platforms
by using a third-party load balancer controller such as MetalLB.
This solves the security problems associated with externalIPs because the
administrator can configure what ranges of IP addresses the controller will assign
to services, and the controller will ensure that two services can't both use the same
IP.
So, for example, after installing and configuring MetalLB, a cluster administrator could configure a pool of IP addresses for use in the cluster:
apiVersion: metallb.io/v1beta1
kind: IPAddressPool
metadata:
 name: production
 namespace: metallb-system
spec:
 addresses:
 - 192.0.2.0/24
 autoAssign: true
 avoidBuggyIPs: false
After which a user can create a type: LoadBalancer Service and MetalLB will handle the
assignment of the IP address. MetalLB even supports the deprecated loadBalancerIP
field in Service, so the end user can request a specific IP (assuming it is available)
for backward-compatibility with the externalIPs approach, rather than being
assigned one at random:
apiVersion: v1
kind: Service
metadata:
 name: my-example-service
spec:
 type: LoadBalancer
 selector:
 app.kubernetes.io/name: my-example-app
 ports:
 - protocol: TCP
 port: 80
 targetPort: 8080
 loadBalancerIP: "192.0.2.4"
Similar approaches would work with other load balancer controllers. This approach can allow cluster administrators to have control over which IP addresses are assigned, rather than users.
Using Gateway API
Another potential solution is to use an implementation of the Gateway API.
Gateway API allows cluster administrators to define a Gateway resource, which can have an IP address
attached to it via the .spec.addresses field. Since Gateway resources are designed to be managed by
cluster administrators, RBAC rules can be put in place to only allow privileged users to manage them.
An example of how this could look is:
apiVersion: gateway.networking.k8s.io/v1
kind: Gateway
metadata:
 name: example-gateway
spec:
 gatewayClassName: example-gateway-class
 addresses:
 - type: IPAddress
 value: "192.0.2.4"
---
apiVersion: gateway.networking.k8s.io/v1
kind: HTTPRoute
metadata:
 name: example-route
spec:
 parentRefs:
 - name: example-gateway
 rules:
 - backendRefs:
 - name: example-svc
 port: 80
---
apiVersion: v1
kind: Service
metadata:
 name: example-svc
spec:
 type: ClusterIP
 selector:
 app.kubernetes.io/name: example-app
 ports:
 - protocol: TCP
 port: 80
 targetPort: 8080
The Gateway API project is the next generation of Kubernetes Ingress, Load Balancing, and Service Mesh APIs within Kubernetes. Gateway API was designed to fix the shortcomings of the Service and Ingress resource, making it a very reliable robust solution that is under active development.
Timeline for externalIPs deprecation
The rough timeline for this deprecation is as follows:
- With the release of Kubernetes 1.36, the field was deprecated; Kubernetes now emits warnings when a user uses this field
- About a year later (v1.40 at the earliest) support for
.spec.externalIPswill be disabled in kube-proxy, but users will have a way to opt back in should they require more time to migrate away - About another year later - (v1.43 at the earliest) support will be disabled completely; users won't have a way to opt back in
Kubernetes v1.36: Advancing Workload-Aware Scheduling
AI/ML and batch workloads introduce unique scheduling challenges that go beyond simple Pod-by-Pod scheduling. In Kubernetes v1.35, we introduced the first tranche of workload-aware scheduling improvements, featuring the foundational Workload API alongside basic gang scheduling support built on a Pod-based framework, and an opportunistic batching feature to efficiently process identical Pods.
Kubernetes v1.36 introduces a significant architectural evolution by cleanly separating API concerns:
the Workload API acts as a static template, while the new PodGroup API handles the runtime state.
To support this, the kube-scheduler features a new PodGroup scheduling cycle that enables atomic workload processing
and paves the way for future enhancements. This release also debuts the first iterations of topology-aware scheduling
and workload-aware preemption to advance scheduling capabilities. Additionally,
ResourceClaim support for workloads unlocks Dynamic Resource Allocation
(DRA) for PodGroups. Finally,
to demonstrate real-world readiness, v1.36 delivers the first phase of integration between the Job controller and the new API.
Workload and PodGroup API updates
The Workload API now serves as a static template, while the new PodGroup API describes the runtime object.
Kubernetes v1.36 introduces the Workload and PodGroup APIs as part of the
scheduling.k8s.io/v1alpha2 API group,
completely replacing the previous v1alpha1 API version.
In v1.35, Pod groups and their runtime states were embedded within the Workload resource. The new model decouples these concepts: the Workload now serves as a static template object, while the PodGroup manages the runtime state. This separation also improves performance and scalability as the PodGroup API allows per-replica sharding of status updates.
Because the Workload API acts merely as a template, the kube-scheduler's logic is streamlined.
The scheduler can directly read the PodGroup, which contains all the information required by the scheduler,
without needing to watch or parse the Workload object itself.
Here is what the updated configuration looks like. Workload controllers (such as the Job controller) define the Workload object, which now acts as a static template for your Pod groups:
apiVersion: scheduling.k8s.io/v1alpha2
kind: Workload
metadata:
 name: training-job-workload
 namespace: some-ns
spec:
 # Pod groups are now defined as templates,
 # which contains the PodGroup objects' spec fields.
 podGroupTemplates:
 - name: workers
 schedulingPolicy:
 gang:
 # The gang is schedulable only if 4 pods can run at once
 minCount: 4
Controllers then stamp out runtime PodGroup instances based on those templates. The PodGroup runtime object holds the actual scheduling policy and references the template from which it was created. It also has a status containing conditions that mirror the states of individual Pods, reflecting the overall scheduling state of the group:
apiVersion: scheduling.k8s.io/v1alpha2
kind: PodGroup
metadata:
 name: training-job-workers-pg
 namespace: some-ns
spec:
 # The PodGroup references the Workload template it originated from.
 # In comparison, .metadata.ownerReferences points to the "true" workload object,
 # e.g., a Job.
 podGroupTemplateRef:
 workload:
 workloadName: training-job-workload
 podGroupTemplateName: workers
 # The actual scheduling policy is placed inside the runtime PodGroup
 schedulingPolicy:
 gang:
 minCount: 4
status:
 # The status contains conditions mirroring individual Pod conditions.
 conditions:
 - type: PodGroupScheduled
 status: "True"
 lastTransitionTime: 2026-04-03T00:00:00Z
Finally, to bridge this new architecture with individual Pods, the workloadRef field in the Pod API has been replaced
with the schedulingGroup field. When creating Pods, you link them directly to the runtime PodGroup:
apiVersion: v1
kind: Pod
metadata:
 name: worker-0
 namespace: some-ns
spec:
 # The workloadRef field has been replaced by schedulingGroup
 schedulingGroup:
 podGroupName: training-job-workers-pg
 ...
By keeping the Workload as a static template and elevating the PodGroup to a first-class, standalone API, we establish a robust foundation for building advanced workload scheduling capabilities in future Kubernetes releases.
PodGroup scheduling cycle and gang scheduling
To efficiently manage these workloads, the kube-scheduler now features a dedicated PodGroup scheduling cycle. Instead of evaluating and reserving resources sequentially Pod-by-Pod, which risks scheduling deadlocks, the scheduler evaluates the group as a unified operation.
When the scheduler pops a PodGroup member from the scheduling queue, regardless of the group's specific policy, it fetches the rest of the queued Pods for that group, sorts them deterministically, and executes an atomic scheduling cycle as follows:
-
The scheduler takes a single snapshot of the cluster state to prevent race conditions and ensure consistency while evaluating the entire group.
-
It then attempts to find valid Node placements for all Pods in the group using a PodGroup scheduling algorithm, which leverages the standard Pod-based filtering and scoring phases.
-
Based on the algorithm's outcome, the scheduling decision is applied atomically for the entire PodGroup.
-
Success: If the placement is found and group constraints are met, the schedulable member Pods are moved directly to the binding phase together. Any remaining unschedulable Pods are returned to the scheduling queue to wait for available resources so they can join the already scheduled Pods.
(Note: If new Pods are added to a PodGroup after others are already scheduled, the cycle evaluates the new Pods while accounting for the existing ones. Crucially, Pods already assigned to Nodes remain running. The scheduler will not unassign or evict them, even if the group fails to meet its requirements in subsequent cycles.)
-
Failure: If the group fails to meet its requirements, the entire group is considered unschedulable. None of the Pods are bound, and they are returned to the scheduling queue to retry later after a backoff period.
-
This cycle acts as the foundation for gang scheduling. When your workload requires strict all-or-nothing placement,
the gang policy leverages this cycle to prevent partial deployments that lead to resource wastage and potential deadlocks.
While the scheduler still holds the Pods in the PreEnqueue until the minCount requirement is met, the actual scheduling phase now relies entirely
on the new PodGroup cycle. Specifically, during the algorithm's execution, the scheduler verifies
that the number of schedulable Pods satisfies the minCount. If the cluster cannot accommodate the required minimum,
none of the pods are bound. The group fails and waits for sufficient resources to free up.
Limitations
The first version of the PodGroup scheduling cycle comes with certain limitations:
-
For basic homogeneous Pod groups (i.e., those where all Pods have identical scheduling requirements and lack inter-Pod dependencies like affinity, anti-affinity, or topology spread constraints), the algorithm is expected to find a placement if one exists.
-
For heterogeneous Pod groups, finding a valid placement if one exists is not guaranteed, even when the solution might seem trivial.
-
For Pod groups with inter-Pod dependencies, finding a valid placement if one exists is not guaranteed.
In addition to the above, for cases involving intra-group dependencies (e.g., when the schedulability of one Pod depends on another group member via inter-Pod affinity), this algorithm may fail to find a placement regardless of cluster state due to its deterministic processing order.
Topology-aware scheduling
For complex distributed workloads like AI/ML training or batch processing, placing Pods randomly across a cluster can introduce significant network latency and bottleneck overall performance.
Topology-aware scheduling addresses this problem by allowing you to define topology constraints directly on a PodGroup, ensuring its Pods are co-located within specific physical or logical domains:
apiVersion: scheduling.k8s.io/v1alpha2
kind: PodGroup
metadata:
 name: topology-aware-workers-pg
spec:
 schedulingPolicy:
 gang:
 minCount: 4
 # Enforce that the pods are co-located based on the rack topology
 schedulingConstraints:
 topology:
 - key: topology.kubernetes.io/rack
In this example, the kube-scheduler attempts to schedule the Pods across various combinations of Nodes
that match the rack topology constraint. It then selects the optimal placement based on how efficiently
the PodGroup utilizes resources and how many Pods can successfully be scheduled within that domain.
To achieve this, the scheduler extends the PodGroup scheduling cycle with a dedicated placement-based algorithm consisting of three phases:
-
Generate candidate placements (subsets of Nodes that are theoretically feasible for the PodGroup's assignment) based on the group's scheduling constraints. The topology-aware scheduling plugin uses the new
PlacementGenerateextension point to create these placements. -
Evaluate each proposed placement to confirm whether the entire PodGroup can actually fit there.
-
Score all feasible placements to select the best fit for the PodGroup. The topology-aware scheduling plugins use the new
PlacementScoreextension point to score these placements.
Currently, topology-aware scheduling does not trigger Pod preemption to satisfy constraints. However, we plan to integrate workload-aware preemption with topology constraints in the upcoming release.
While Kubernetes v1.36 delivers this foundational topology-aware scheduling, the Kubernetes project is planning
expand its capabilities soon. Future updates will introduce support for multiple topology levels,
soft constraints (preferences), deeper integration with Dynamic Resource Allocation (DRA),
and more robust behavior when paired with the basic scheduling policy.
Workload-aware preemption
To support the new PodGroup scheduling cycle, Kubernetes v1.36 introduces a new type of preemption mechanism called workload-aware preemption. When a PodGroup cannot be scheduled, the scheduler utilizes this mechanism to try making a scheduling of this PodGroup possible.
Compared to the default preemption used in the standard Pod-by-Pod scheduling cycle, this new mechanism treats the entire PodGroup as a single preemptor unit. Instead of evaluating preemption victims on each Node separately, it searches across the entire cluster. This allows the scheduler to preempt Pods from multiple Nodes simultaneously, making enough space to schedule the whole PodGroup afterwards.
Workload-aware preemption also introduces two additional concepts directly to the PodGroup API:
-
PodGroup
prioritythat overrides the priority of the individual Pods forming the PodGroup. -
PodGroup
disruptionModethat dictates whether the Pods within a PodGroup can be preempted independently, or if they have to be preempted together in an all-or-nothing fashion.
In Kubernetes v1.36, these fields are only respected by the workload-aware preemption mechanism. The people working on this set of features are hoping to extend support for these fields to other disruption sources, including default preemption used in the Pod-by-Pod scheduling cycle, in future releases.
apiVersion: scheduling.k8s.io/v1alpha2
kind: PodGroup
metadata:
 name: victim-pg
spec:
 priorityClassName: high-priority
 priority: 1000
 disruptionMode: PodGroup
In this example, when the scheduler evaluates victim-pg as a potential preemption victim
during a workload-aware preemption cycle, it will use 1000 as its priority and preempt the PodGroup
in a strictly all-or-nothing fashion.
DRA ResourceClaim support for workloads
Since its general availability in Kubernetes v1.34, DRA has enabled Pods to make detailed requests for devices like GPUs, TPUs, and NICs. Requested devices can be shared by multiple Pods requesting the same ResourceClaim by name. Other requests can be replicated through a ResourceClaimTemplate, in which Kubernetes generates one ResourceClaim with a non-deterministic name for each Pod referencing the template. However, large-scale workloads that require certain Pods to share certain devices are currently left to manage creating individual ResourceClaims themselves.
Now, in addition to Pods, PodGroups can represent the replicable unit for a
ResourceClaimTemplate. For ResourceClaimTemplates referenced by one of a
PodGroup's spec.resourceClaims, Kubernetes generates one ResourceClaim for the
entire PodGroup, no matter how many Pods are in the group. When one of a Pod's
spec.resourceClaims for a ResourceClaimTemplate matches one of its PodGroup's
spec.resourceClaims, the Pod's claim resolves to the ResourceClaim generated
for the PodGroup and a ResourceClaim will not be generated for that individual
Pod. A single PodGroupTemplate in a Workload object can express resource
requests which are both copied for each distinct PodGroup and shareable by the
Pods within each group.
The following example shows two Pods requesting the same ResourceClaim generated from a ResourceClaimTemplate for their PodGroup:
apiVersion: scheduling.k8s.io/v1alpha2
kind: PodGroup
metadata:
 name: training-job-workers-pg
spec:
 ...
 resourceClaims:
 - name: pg-claim
 resourceClaimTemplateName: my-claim-template
---
apiVersion: v1
kind: Pod
metadata:
 name: topology-aware-workers-pg-pod-1
spec:
 ...
 schedulingGroup:
 podGroupName: training-job-workers-pg
 resourceClaims:
 - name: pg-claim
 resourceClaimTemplateName: my-claim-template
---
apiVersion: v1
kind: Pod
metadata:
 name: topology-aware-workers-pg-pod-2
spec:
 ...
 schedulingGroup:
 podGroupName: training-job-workers-pg
 resourceClaims:
 - name: pg-claim
 resourceClaimTemplateName: my-claim-template
In addition, ResourceClaims referenced by PodGroups, either through
resourceClaimName or the claim generated from resourceClaimTemplateName,
become reserved for the entire PodGroup. Previously, kube-scheduler could only
list individual Pods in a ResourceClaim's status.reservedFor field which is
limited to 256 items. Now, a single PodGroup reference in status.reservedFor
can represent many more than 256 Pods, allowing high-cardinality sharing of
devices.
Together, these changes enable massive workloads with complex topologies to utilize DRA for scalable device management.
Integration with the Job controller
In Kubernetes v1.36, the Job controller can create and manage Workload and PodGroup objects on your behalf, so that Jobs representing a tightly coupled parallel application, such as distributed AI training, are gang-scheduled without any additional tooling. Without this integration, you would have to create the Workload and PodGroup yourself and wire their references into the Pod template. Now, the Job controller automates this process natively.
When the WorkloadWithJob
feature gate is enabled, the Job controller automatically:
-
creates a Workload and a corresponding runtime PodGroup for each qualifying Job,
-
sets
.spec.schedulingGrouponto every Pod the Job creates so the scheduler treats them as a single gang, and -
sets the Job as the owner of the generated objects, so they are garbage-collected when the Job is deleted.
When does the integration kick in?
To keep the first feature iteration predictable, the Job controller only creates a Workload and PodGroup when the Job has a well-defined, fixed shape:
-
.spec.parallelismis greater than 1 -
.spec.completionModeis set toIndexed -
.spec.completionsis equal to.spec.parallelism -
The
schedulingGroupis not already set on the Pod template.
These conditions describe the class of Jobs that gang scheduling can reason about:
each Pod has a stable identity (Indexed), the gang size is known and fixed at admission time
(parallelism == completions), and no other controller has already claimed scheduling responsibility
(schedulingGroup field is unset). Jobs that do not meet these conditions are scheduled Pod-by-Pod,
exactly as before.
If you set schedulingGroup on the Pod template yourself (for example,
because a higher-level controller is managing the workload), the Job controller leaves
the Pod template alone and does not create its own Workload or PodGroup. This makes the feature
safe to enable in clusters that already use an external batch system.
Here is an example of a Job that qualifies for gang scheduling:
apiVersion: batch/v1
kind: Job
metadata:
 name: training-job
 namespace: job-ns
spec:
 completionMode: Indexed
 parallelism: 4
 completions: 4
 template:
 spec:
 restartPolicy: Never
 containers:
 - name: worker
 image: registry.example/trainer:latest
The Job controller creates a Workload and a PodGroup owned by this Job,
and every Pod it creates carries a .spec.schedulingGroup that points at the generated PodGroup.
The Pods are then scheduled together once all four can be placed at the same time using
the PodGroup scheduling cycle described earlier in this post.
What's not covered yet
The current constraints limit this integration to static, indexed, fully-parallel Jobs. Support for additional workload shapes, including elastic Jobs and other built-in controllers, is tracked in KEP-5547.
In future Kubernetes releases, this integration will expand to support additional workload controllers, and the current constraints for Jobs may be relaxed.
What's next?
The journey for workload-aware scheduling doesn't stop here. For v1.37, the community is actively working on:
-
Graduating Workload and PodGroup APIs to Beta: Our primary goal is to mature the Workload and PodGroup APIs to the Beta stage, solidifying their foundational role in the Kubernetes ecosystem. As part of this graduation process, we also plan to introduce
minCountmutability to unlock elastic jobs and allow dynamic workloads to scale efficiently. -
Multi-level Workload hierarchies: To support complex modern AI workloads like JobSet or Disaggregated Inference via LeaderWorkerSet (LWS), we are working on expanding the architecture to support multi-level hierarchies. We aim to introduce a new API that allows grouping multiple PodGroups into hierarchical structures, directly reflecting the organization of real-world workload controllers.
-
Graduating advanced scheduling features: We are focused on driving the maturity of the broader workload-aware scheduling ecosystem. This includes bringing existing features, such as topology-aware scheduling and workload-aware preemption, to the Beta stage.
-
Unified controller integration API: To streamline adoption, we’re working on a controller integration API. This will provide real-world workload controllers with a unified, standardized method for consuming workload-aware scheduling capabilities.
The priority and implementation order of these focus areas are subject to change. Stay tuned for further updates.
Getting started
All below workload-aware scheduling improvements are available as Alpha features in v1.36. To try them out, you must configure the following:
- Prerequisite: Workload and PodGroup API support: Enable the
GenericWorkloadfeature gate on both thekube-apiserverandkube-scheduler, and ensure thescheduling.k8s.io/v1alpha2API group is enabled.
Once the prerequisite is met, you can enable specific features:
- Gang scheduling: Enable the
GangSchedulingfeature gate on thekube-scheduler. - Topology-aware scheduling: Enable the
TopologyAwareWorkloadSchedulingfeature gate on thekube-scheduler. - Workload-aware preemption: Enable the
WorkloadAwarePreemptionfeature gate on thekube-scheduler(requiresGangSchedulingto also be enabled). - DRA ResourceClaim support for workloads: Enable the
DRAWorkloadResourceClaimsfeature gate on thekube-apiserver,kube-controller-manager,kube-schedulerandkubelet. - Workload API integration with the Job controller: Enable the
WorkloadWithJobfeature gate on thekube-apiserverandkube-controller-manager.
We encourage you to try out workload-aware scheduling in your test clusters and share your experiences to help shape the future of Kubernetes scheduling. You can send your feedback by:
- Reaching out via Slack (#workload-aware-scheduling).
- Joining the SIG Scheduling meetings.
- Filing a new issue in the Kubernetes repository.
Learn more
To dive deeper into the architecture and design of these features, read the KEPs:
Kubernetes at Uber with Lucy Sweet
Guest is Lucy Sweet, a Staff Software engineer at Uber and the lead for the Kubernetes Node Lifecycle Working Group. Imagine trying to move millions of compute cores and thousands of microservices to a brand new platform. All without dropping a single user request, ride, or delivery. Sounds like an absolute logistical nightmare, right? Well, today we are sitting down with someone who actually lived to tell the tale Lucy. In this episode, we are diving deep into Uber's monumental infrastructure journey: moving away from their in-house system to Kubernetes. We'll be unpacking the reality of running at this scale, why it's always DNS and why building things for fun is worth it.
Do you have something cool to share? Some questions? Let us know:
- web: kubernetespodcast.com
- mail: [email protected]
- twitter: @kubernetespod
- bluesky: @kubernetespodcast.com
News of the week
-
Broadcom announced donating Velero to the CNCF Sandbox Level
-
KubeCon && CloudNativeCon Amsterdam 2026 Transparency report
-
Call for Proposals for KubeCon && CloudNativeCon North America 2026 closes May 31
Kubernetes v1.36: PSI Metrics for Kubernetes Graduates to GA
Since its original implementation in the Linux kernel in 2018, Pressure Stall Information (PSI) has provided users with the high-fidelity signals needed to identify resource saturation before it becomes an outage. Unlike traditional utilization metrics, PSI tells the story of tasks stalled and time lost, all in nicely-packaged percentages of time across the CPU, memory, and I/O.
With the recent release of Kubernetes v1.36, users across the ecosystem have a stable, reliable interface to observe resource contention at the node, pod, and container levels. In this post, we will dive into the improvements and performance testing that proved its readiness for production.
Beyond utilization: why PSI?
Monitoring CPU or memory usage alone can be misleading. A node may report XX% (below 100%) CPU utilization while certain tasks are experiencing severe latency due to scheduling delays. PSI fills this gap by providing:
- Cumulative Totals: Absolute time spent in a stalled state.
- Moving Averages: 10s, 60s, and 300s windows that allow operators to distinguish between transient spikes and sustained resource tension.
Proving stability: performance testing at scale
A common concern when graduating telemetry features is the resource overhead required to collect and serve the metrics. To address this, SIG Node conducted extensive performance validation on high-density workloads (80+ pods) across various machine types.
Our testing focused on two primary scenarios to isolate the impact of the Kubelet and kernel-level collection respectively:
- Kernel PSI ON / Kubelet Feature OFF vs Kernel PSI ON / Kubelet Feature ON (Kubelet overhead)
- Kernel PSI OFF / Kubelet Feature ON vs Kernel PSI ON / Kubelet Feature ON (Kernel overhead)
Scenario 1: The Kubelet Overhead
First, we looked at the kubelet usage on 4 core machines (Case 1). For these, the Linux kernel was already tracking pressure on both clusters by default(psi=1), but we toggled the KubeletPSI feature gate to see if the Kubelet actively querying and exposing these metrics impacted the resource usage. The synchronized bursts seen in the graph are practically identical in both magnitude and frequency, confirming that the Kubelet's collection logic is highly lightweight and blends seamlessly into standard housekeeping cycles. There is no issue about the feature affecting the pre-existing resource use, staying within the normal 0.1 cores or 2.5% of the total node capacity, and is therefore safe for production-scale deployments.
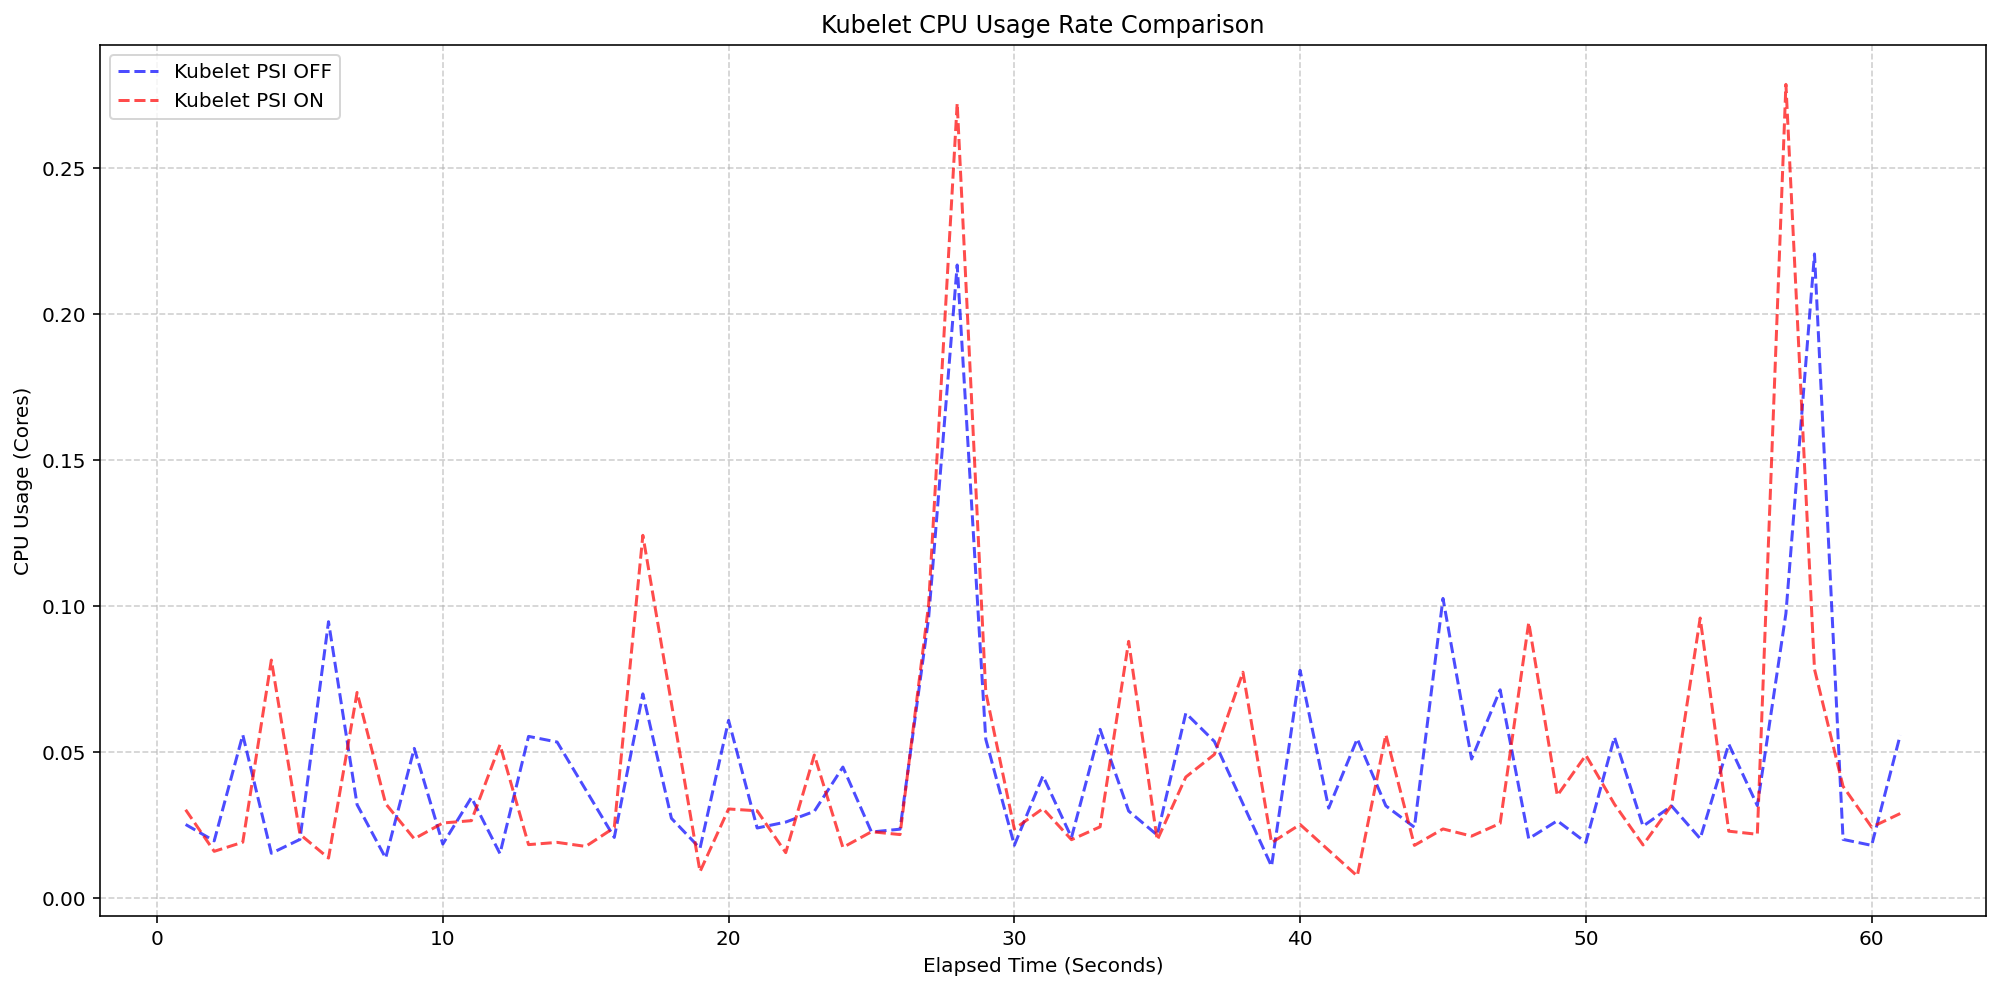
(Case 1) Kubelet CPU Usage Rate Comparison
Figure 2: Kubelet CPU Usage Rate Comparison.
Next, we evaluated the system overhead in the same run. As seen in the following graph, the System CPU usage lines for the Kubelet PSI-enabled (red) follows the same pattern as the Kubelet PSI-disabled (blue) clusters, with a slight expected increase from the baseline. This visualizes that once the OS is tracking PSI, at around 2.5 cores, the act of Kubernetes reading those cgroup metrics is negligible to performance.
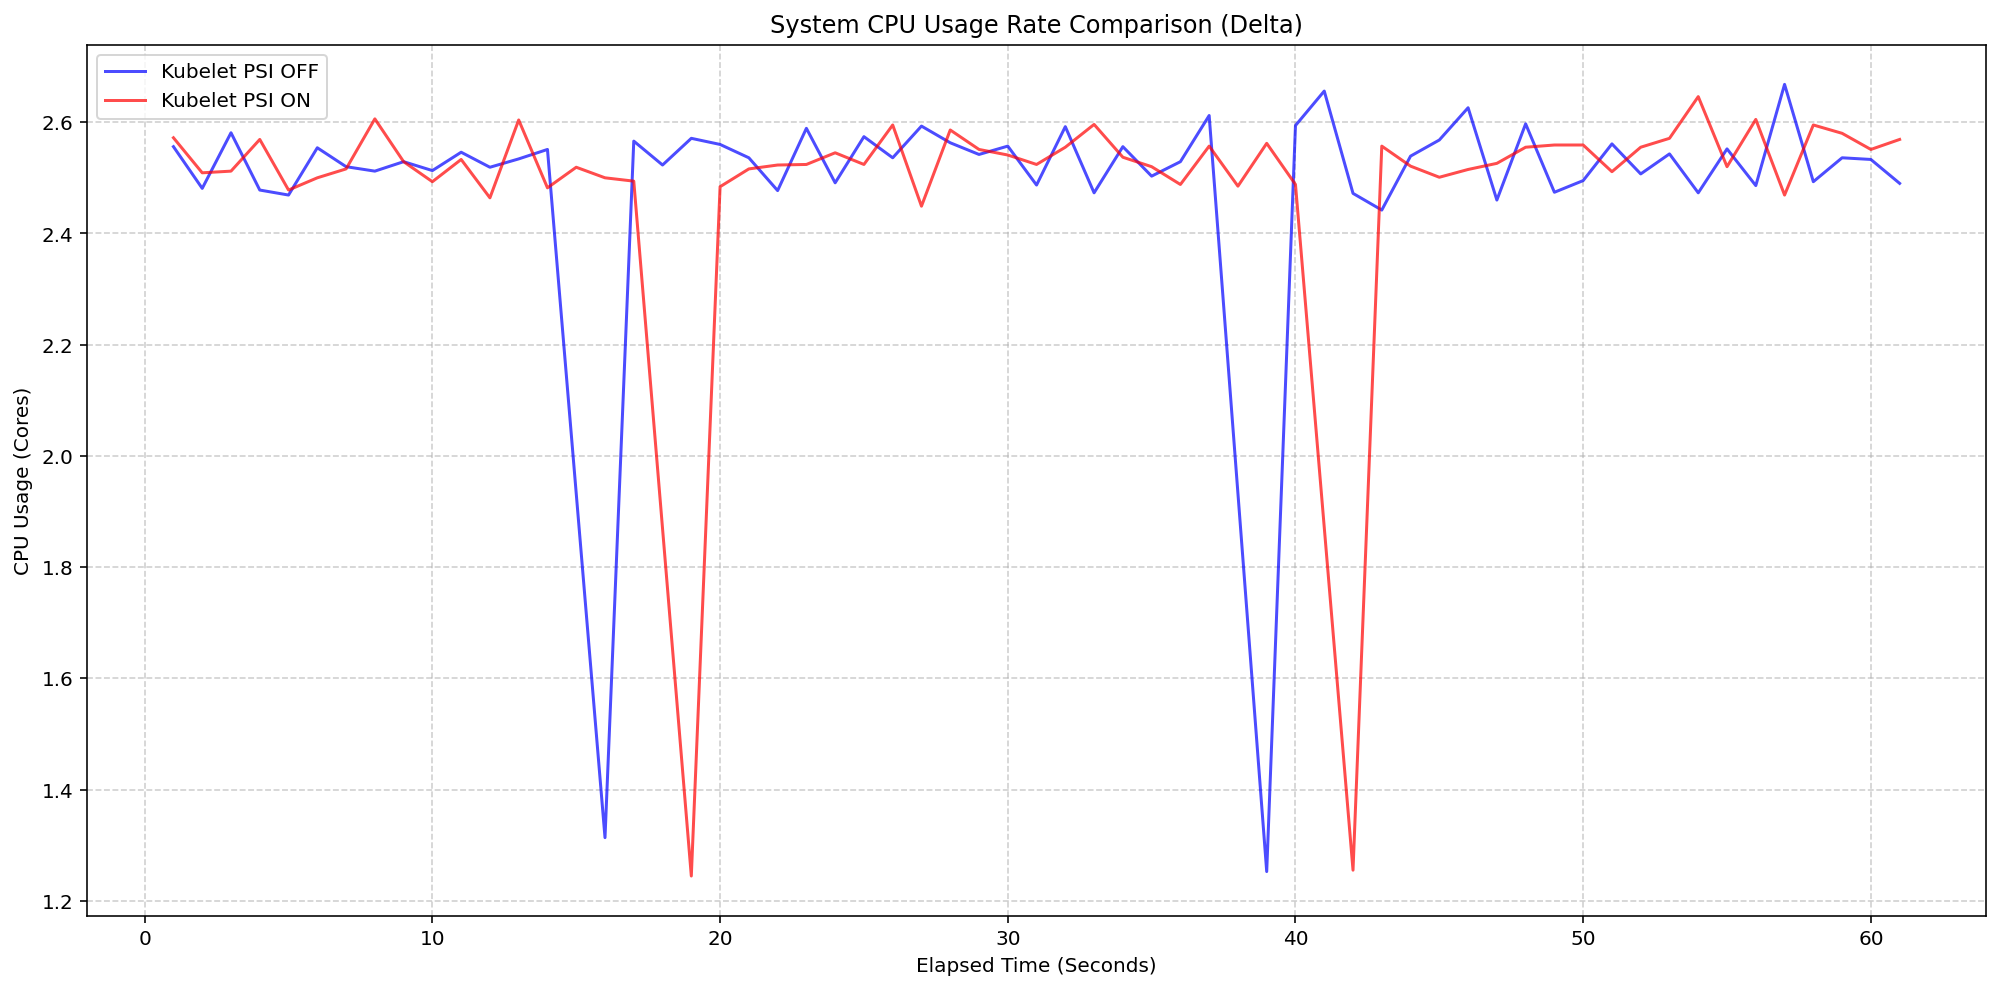
(Case 1) System CPU Usage Rate Comparison
Figure 1: Node System CPU Usage Rate Comparison.
Scenario 2: The Kernel Overhead
Shifting gears, we evaluated the underlying overhead of enabling PSI on the Linux kernel also on a 4 core machine. By comparing a cluster booted with psi=1 (COS default) against a cluster with psi=0, we isolated the exact cost of the OS-level bookkeeping. Even under heavy I/O and CPU load at an 80-pod density, the System CPU delta between the kernel-enabled and kernel-disabled clusters remained consistently between 0.037 cores and 0.125 cores or 0.925% - 3.125% of the total node capacity. There was a single spike to 0.225 cores, or 5.6%, but was controlled back down within a few seconds. This confirms that the internal kernel tracking is highly efficient under load.

(Case 2) Node System CPU Usage Rate Comparison
Figure 3: Node System CPU Usage Rate Comparison.
Figure 4 zooms in on the kubelet process itself, which serves as the primary collector for these metrics. . The results show that even while the kubelet performs periodic sweeps to aggregate data from the cgroup hierarchy, its CPU usage remains remarkably low with interchangeable spikes and nothing exceeding 0.25 cores or 6.25% of total capacity for longer than a second.
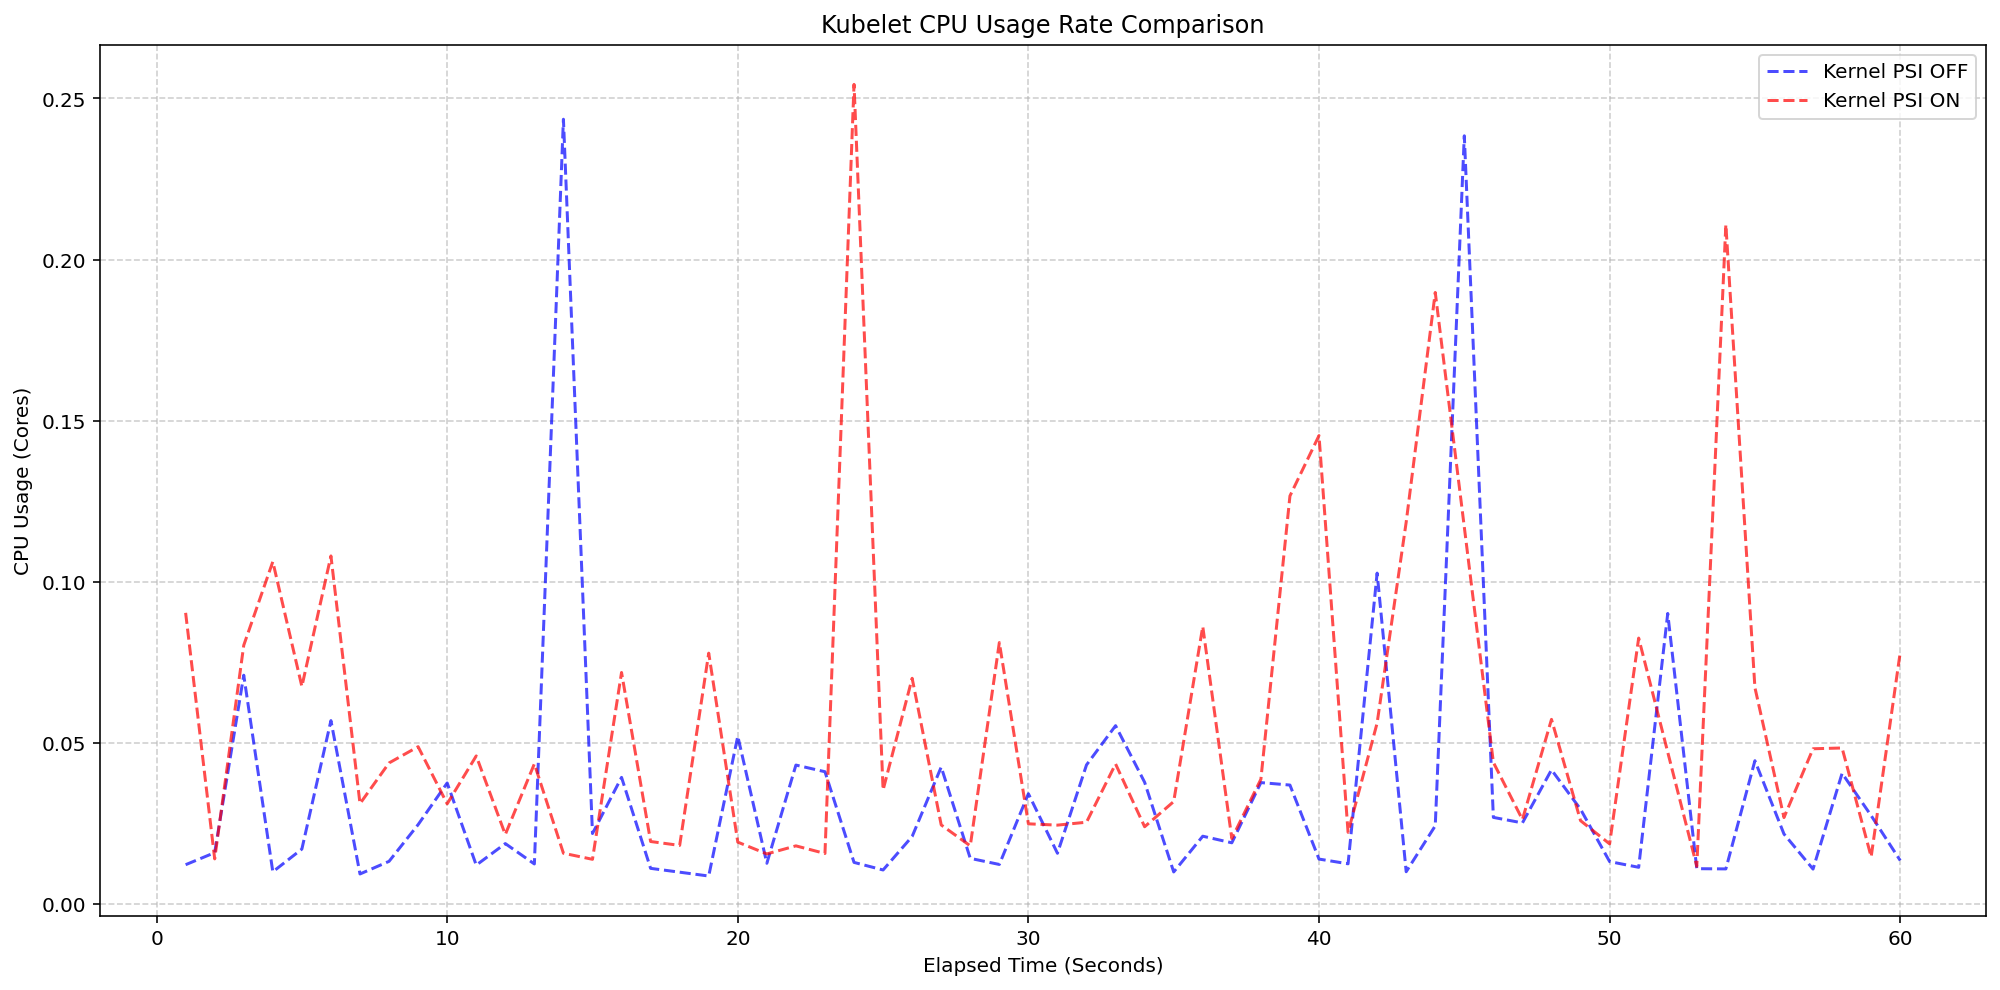
(Case 2) Kubelet CPU Usage Rate Comparison
Figure 4: Kubelet CPU Usage Rate Comparison.
Improvements between beta (1.34) and stable (1.36)
- Smarter Metric Emission for GA: We improved how the Kubelet handles underlying OS support for PSI. Previously, if the feature was enabled in Kubernetes but the underlying Linux kernel didn't support PSI (
psi=0), the Kubelet would emit misleading zero-valued metrics. These could trigger false alarms when read as real metrics instead of missing values. In v1.36, the Kubelet now detects OS-level PSI support via cgroup configurations before reporting. This ensures that pressure metrics are only collected and emitted when they are actually supported by the node, providing cleaner data for monitoring and alerting systems.
Getting started
To use PSI metrics in your Kubernetes cluster, your nodes must meet the following requirements:
- Ensure your nodes are running a Linux kernel version 4.20 or later and are using cgroup v2.
- Ensure PSI is enabled at the OS level (your kernel must be compiled with
CONFIG_PSI=yand must not be booted with thepsi=0parameter).
As of v1.36, Kubelet PSI metrics are generally available and you do not need to opt in to any feature gate.
Once the OS prerequisites are met, you can start scraping the /metrics/cadvisor endpoint with your Prometheus-compatible monitoring solution or query the Summary API to collect and visualize the new PSI metrics. Note that PSI is a Linux-kernel feature, so these metrics are not available on Windows nodes. Your cluster can contain a mix of Linux and Windows nodes, and on the Windows nodes, the kubelet will simply omit the PSI metrics.
If your cluster is running a recent enough version of Kubernetes and you are a privileged node administrator, you can also proxy to the kubelet's HTTP API via the control plane's API server to see real-time pressure data from the Summary API.
Caution: Proxying to the kubelet is a privileged operation. Granting access to it is a security risk, so ensure you have the appropriate administrative permissions before executing these commands.
CONTAINER_NAME="example-container"
kubectl get --raw "/api/v1/nodes/$(kubectl get nodes -o jsonpath='{.items[0].metadata.name}')/proxy/stats/summary" | jq '.pods[].containers[] | select(.name=="'"$CONTAINER_NAME"'") | {name, cpu: .cpu.psi, memory: .memory.psi, io: .io.psi}'
Further reading
If you want to dive deeper into how these metrics are calculated and exposed, check out these resources:
- The official Kernel documentation
- Understanding PSI in the Kubernetes documentation
- cAdvisor Metrics Implementation
Acknowledgements
Support for PSI metrics was developed through the collaborative efforts of SIG Node. Special thanks to all contributors who helped design, implement, test, review, and document this feature across its journey from alpha in v1.33, through beta in v1.34, to GA in v1.36.
To provide feedback on this feature, join the Kubernetes Node Special Interest Group, participate in discussions on the public Slack channel (#sig-node), or file an issue on GitHub.
Feedback
If you have feedback and want to share your experience using this feature, join the discussion:
- SIG Node community page
- Kubernetes Slack in the #sig-node channel
- SIG Node mailing list
SIG Node would love to hear about your experiences using this feature in production!
Kubernetes v1.36: PSI Metrics for Kubernetes Graduates to GA
Since its original implementation in the Linux kernel in 2018, Pressure Stall Information (PSI) has provided users with the high-fidelity signals needed to identify resource saturation before it becomes an outage. Unlike traditional utilization metrics, PSI tells the story of tasks stalled and time lost, all in nicely-packaged percentages of time across the CPU, memory, and I/O.
With the recent release of Kubernetes v1.36, users across the ecosystem have a stable, reliable interface to observe resource contention at the node, pod, and container levels. In this post, we will dive into the improvements and performance testing that proved its readiness for production.
Beyond utilization: why PSI?
Monitoring CPU or memory usage alone can be misleading. A node may report XX% (below 100%) CPU utilization while certain tasks are experiencing severe latency due to scheduling delays. PSI fills this gap by providing:
- Cumulative Totals: Absolute time spent in a stalled state.
- Moving Averages: 10s, 60s, and 300s windows that allow operators to distinguish between transient spikes and sustained resource tension.
Proving stability: performance testing at scale
A common concern when graduating telemetry features is the resource overhead required to collect and serve the metrics. To address this, SIG Node conducted extensive performance validation on high-density workloads (80+ pods) across various machine types.
Our testing focused on two primary scenarios to isolate the impact of the Kubelet and kernel-level collection respectively:
- Kernel PSI ON / Kubelet Feature OFF vs Kernel PSI ON / Kubelet Feature ON (Kubelet overhead)
- Kernel PSI OFF / Kubelet Feature ON vs Kernel PSI ON / Kubelet Feature ON (Kernel overhead)
Scenario 1: The Kubelet Overhead
First, we looked at the kubelet usage on 4 core machines (Case 1). For these, the Linux kernel was already tracking pressure on both clusters by default(psi=1), but we toggled the KubeletPSI feature gate to see if the Kubelet actively querying and exposing these metrics impacted the resource usage. The synchronized bursts seen in the graph are practically identical in both magnitude and frequency, confirming that the Kubelet's collection logic is highly lightweight and blends seamlessly into standard housekeeping cycles. There is no issue about the feature affecting the pre-existing resource use, staying within the normal 0.1 cores or 2.5% of the total node capacity, and is therefore safe for production-scale deployments.
(Case 1) Kubelet CPU Usage Rate Comparison
Figure 2: Kubelet CPU Usage Rate Comparison.
Next, we evaluated the system overhead in the same run. As seen in the following graph, the System CPU usage lines for the Kubelet PSI-enabled (red) follows the same pattern as the Kubelet PSI-disabled (blue) clusters, with a slight expected increase from the baseline. This visualizes that once the OS is tracking PSI, at around 2.5 cores, the act of Kubernetes reading those cgroup metrics is negligible to performance.
(Case 1) System CPU Usage Rate Comparison
Figure 1: Node System CPU Usage Rate Comparison.
Scenario 2: The Kernel Overhead
Shifting gears, we evaluated the underlying overhead of enabling PSI on the Linux kernel also on a 4 core machine. By comparing a cluster booted with psi=1 (COS default) against a cluster with psi=0, we isolated the exact cost of the OS-level bookkeeping. Even under heavy I/O and CPU load at an 80-pod density, the System CPU delta between the kernel-enabled and kernel-disabled clusters remained consistently between 0.037 cores and 0.125 cores or 0.925% - 3.125% of the total node capacity. There was a single spike to 0.225 cores, or 5.6%, but was controlled back down within a few seconds. This confirms that the internal kernel tracking is highly efficient under load.
(Case 2) Node System CPU Usage Rate Comparison
Figure 3: Node System CPU Usage Rate Comparison.
Figure 4 zooms in on the kubelet process itself, which serves as the primary collector for these metrics. . The results show that even while the kubelet performs periodic sweeps to aggregate data from the cgroup hierarchy, its CPU usage remains remarkably low with interchangeable spikes and nothing exceeding 0.25 cores or 6.25% of total capacity for longer than a second.
(Case 2) Kubelet CPU Usage Rate Comparison
Figure 4: Kubelet CPU Usage Rate Comparison.
Improvements between beta (1.34) and stable (1.36)
- Smarter Metric Emission for GA: We improved how the Kubelet handles underlying OS support for PSI. Previously, if the feature was enabled in Kubernetes but the underlying Linux kernel didn't support PSI (
psi=0), the Kubelet would emit misleading zero-valued metrics. These could trigger false alarms when read as real metrics instead of missing values. In v1.36, the Kubelet now detects OS-level PSI support via cgroup configurations before reporting. This ensures that pressure metrics are only collected and emitted when they are actually supported by the node, providing cleaner data for monitoring and alerting systems.
Getting started
To use PSI metrics in your Kubernetes cluster, your nodes must meet the following requirements:
- Ensure your nodes are running a Linux kernel version 4.20 or later and are using cgroup v2.
- Ensure PSI is enabled at the OS level (your kernel must be compiled with
CONFIG_PSI=yand must not be booted with thepsi=0parameter).
As of v1.36, Kubelet PSI metrics are generally available and you do not need to opt in to any feature gate.
Once the OS prerequisites are met, you can start scraping the /metrics/cadvisor endpoint with your Prometheus-compatible monitoring solution or query the Summary API to collect and visualize the new PSI metrics. Note that PSI is a Linux-kernel feature, so these metrics are not available on Windows nodes. Your cluster can contain a mix of Linux and Windows nodes, and on the Windows nodes, the kubelet will simply omit the PSI metrics.
If your cluster is running a recent enough version of Kubernetes and you are a privileged node administrator, you can also proxy to the kubelet's HTTP API via the control plane's API server to see real-time pressure data from the Summary API.
Caution: Proxying to the kubelet is a privileged operation. Granting access to it is a security risk, so ensure you have the appropriate administrative permissions before executing these commands.
CONTAINER_NAME="example-container"
kubectl get --raw "/api/v1/nodes/$(kubectl get nodes -o jsonpath='{.items[0].metadata.name}')/proxy/stats/summary" | jq '.pods[].containers[] | select(.name=="'"$CONTAINER_NAME"'") | {name, cpu: .cpu.psi, memory: .memory.psi, io: .io.psi}'
Further reading
If you want to dive deeper into how these metrics are calculated and exposed, check out these resources:
- The official Kernel documentation
- Understanding PSI in the Kubernetes documentation
- cAdvisor Metrics Implementation
Acknowledgements
Support for PSI metrics was developed through the collaborative efforts of SIG Node. Special thanks to all contributors who helped design, implement, test, review, and document this feature across its journey from alpha in v1.33, through beta in v1.34, to GA in v1.36.
To provide feedback on this feature, join the Kubernetes Node Special Interest Group, participate in discussions on the public Slack channel (#sig-node), or file an issue on GitHub.
Feedback
If you have feedback and want to share your experience using this feature, join the discussion:
- SIG Node community page
- Kubernetes Slack in the #sig-node channel
- SIG Node mailing list
SIG Node would love to hear about your experiences using this feature in production!
Kubernetes v1.36: Moving Volume Group Snapshots to GA
Volume group snapshots were introduced as an Alpha feature with the Kubernetes v1.27 release, moved to Beta in v1.32, and to a second Beta in v1.34. We are excited to announce that in the Kubernetes v1.36 release, support for volume group snapshots has reached General Availability (GA).
The support for volume group snapshots relies on a set of extension APIs for group snapshots. These APIs allow users to take crash-consistent snapshots for a set of volumes. Behind the scenes, Kubernetes uses a label selector to group multiple PersistentVolumeClaim objects for snapshotting. A key aim is to allow you to restore that set of snapshots to new volumes and recover your workload based on a crash-consistent recovery point.
This feature is only supported for CSI volume drivers.
An overview of volume group snapshots
Some storage systems provide the ability to create a crash-consistent snapshot of multiple volumes. A group snapshot represents copies made from multiple volumes that are taken at the same point-in-time. A group snapshot can be used either to rehydrate new volumes (pre-populated with the snapshot data) or to restore existing volumes to a previous state (represented by the snapshots).
Why add volume group snapshots to Kubernetes?
The Kubernetes volume plugin system already provides a powerful abstraction that automates the provisioning, attaching, mounting, resizing, and snapshotting of block and file storage. Underpinning all these features is the Kubernetes goal of workload portability.
There was already a VolumeSnapshot API that provides the ability to take a snapshot of a persistent volume to protect against data loss or data corruption. However, some storage systems support consistent group snapshots that allow a snapshot to be taken from multiple volumes at the same point-in-time to achieve write order consistency. This is extremely useful for applications that contain multiple volumes. For example, an application may have data stored in one volume and logs stored in another. If snapshots for these volumes are taken at different times, the application will not be consistent and will not function properly if restored from those snapshots.
While you can quiesce the application first and take individual snapshots sequentially, this process can be time-consuming or sometimes impossible. Consistent group support provides crash consistency across all volumes in the group without the need for application quiescence.
Kubernetes APIs for volume group snapshots
Kubernetes' support for volume group snapshots relies on three API kinds that are used for managing snapshots:
- VolumeGroupSnapshot
- Created by a Kubernetes user (or automation) to request creation of a volume group snapshot for multiple persistent volume claims.
- VolumeGroupSnapshotContent
- Created by the snapshot controller for a dynamically created VolumeGroupSnapshot. It contains information about the provisioned cluster resource (a group snapshot). The object binds to the VolumeGroupSnapshot for which it was created with a one-to-one mapping.
- VolumeGroupSnapshotClass
- Created by cluster administrators to describe how volume group snapshots should be created, including the driver information, the deletion policy, etc.
These three API kinds are defined as CustomResourceDefinitions (CRDs). For the GA release, the API version has been promoted to v1.
What's new in GA?
- The API version for
VolumeGroupSnapshot,VolumeGroupSnapshotContent, andVolumeGroupSnapshotClassis promoted togroupsnapshot.storage.k8s.io/v1. - Enhanced stability and bug fixes based on feedback from the beta releases, including the improvements introduced in v1beta2 for accurate
restoreSizereporting.
How do I use Kubernetes volume group snapshots
Creating a new group snapshot with Kubernetes
Once a VolumeGroupSnapshotClass object is defined and you have volumes you want to snapshot together, you may request a new group snapshot by creating a VolumeGroupSnapshot object.
Label the PVCs you wish to group:
% kubectl label pvc pvc-0 group=myGroup
persistentvolumeclaim/pvc-0 labeled

% kubectl label pvc pvc-1 group=myGroup
persistentvolumeclaim/pvc-1 labeled
For dynamic provisioning, a selector must be set so that the snapshot controller can find PVCs with the matching labels to be snapshotted together.
apiVersion: groupsnapshot.storage.k8s.io/v1
kind: VolumeGroupSnapshot
metadata:
 name: snapshot-daily-20260422
 namespace: demo-namespace
spec:
 volumeGroupSnapshotClassName: csi-groupSnapclass
 source:
 selector:
 matchLabels:
 group: myGroup
The VolumeGroupSnapshotClass is required for dynamic provisioning:
apiVersion: groupsnapshot.storage.k8s.io/v1
kind: VolumeGroupSnapshotClass
metadata:
 name: csi-groupSnapclass
driver: example.csi.k8s.io
deletionPolicy: Delete
How to use group snapshot for restore
At restore time, request a new PersistentVolumeClaim to be created from a VolumeSnapshot object that is part of a VolumeGroupSnapshot. Repeat this for all volumes that are part of the group snapshot.
apiVersion: v1
kind: PersistentVolumeClaim
metadata:
 name: examplepvc-restored-2026-04-22
 namespace: demo-namespace
spec:
 storageClassName: example-sc
 dataSource:
 name: snapshot-0962a745b2bf930bb385b7b50c9b08af471f1a16780726de19429dd9c94eaca0
 kind: VolumeSnapshot
 apiGroup: snapshot.storage.k8s.io
 accessModes:
 - ReadWriteOncePod
 resources:
 requests:
 storage: 100Mi
As a storage vendor, how do I add support for group snapshots?
To implement the volume group snapshot feature, a CSI driver must:
- Implement a new group controller service.
- Implement group controller RPCs:
CreateVolumeGroupSnapshot,DeleteVolumeGroupSnapshot, andGetVolumeGroupSnapshot. - Add group controller capability
CREATE_DELETE_GET_VOLUME_GROUP_SNAPSHOT.
See the CSI spec and the Kubernetes-CSI Driver Developer Guide for more details.
How can I learn more?
- The design spec for the volume group snapshot feature.
- The code repository for volume group snapshot APIs and controller.
- CSI documentation on the group snapshot feature.
How do I get involved?
This project, like all of Kubernetes, is the result of hard work by many contributors from diverse backgrounds working together. On behalf of SIG Storage, I would like to offer a huge thank you to all the contributors who stepped up over the years to help the project reach GA:
- Ben Swartzlander (bswartz)
- Cici Huang (cici37)
- Darshan Murthy (darshansreenivas)
- Hemant Kumar (gnufied)
- James Defelice (jdef)
- Jan Šafránek (jsafrane)
- Madhu Rajanna (Madhu-1)
- Manish M Yathnalli (manishym)
- Michelle Au (msau42)
- Niels de Vos (nixpanic)
- Leonardo Cecchi (leonardoce)
- Rakshith R (Rakshith-R)
- Raunak Shah (RaunakShah)
- Saad Ali (saad-ali)
- Wei Duan (duanwei33)
- Xing Yang (xing-yang)
- Yati Padia (yati1998)
For those interested in getting involved with the design and development of CSI or any part of the Kubernetes Storage system, join the Kubernetes Storage Special Interest Group (SIG). We always welcome new contributors.
We also hold regular Data Protection Working Group meetings. New attendees are welcome to join our discussions.
Kubernetes v1.36: More Drivers, New Features, and the Next Era of DRA
Dynamic Resource Allocation (DRA) has fundamentally changed how platform administrators handle hardware accelerators and specialized resources in Kubernetes. In the v1.36 release, DRA continues to mature, bringing a wave of feature graduations, critical usability improvements, and new capabilities that extend the flexibility of DRA to native resources like memory and CPU, and support for ResourceClaims in PodGroups.
Driver availability continues to expand. Beyond specialized compute accelerators, the ecosystem includes support for networking and other hardware types, reflecting a move toward a more robust, hardware-agnostic infrastructure.
Whether you are managing massive fleets of GPUs, need better handling of failures, or simply looking for better ways to define resource fallback options, the upgrades to DRA in 1.36 have something for you. Let's dive into the new features and graduations!
Feature graduations
The community has been hard at work stabilizing core DRA concepts. In Kubernetes 1.36, several highly anticipated features have graduated to Beta and Stable.
Prioritized list (stable)
Hardware heterogeneity is a reality in most clusters. With the Prioritized list feature, you can confidently define fallback preferences when requesting devices. Instead of hardcoding a request for a specific device model, you can specify an ordered list of preferences (e.g., "Give me an H100, but if none are available, fall back to an A100"). The scheduler will evaluate these requests in order, drastically improving scheduling flexibility and cluster utilization.
Extended resource support (beta)
As DRA becomes the standard for resource allocation, bridging the gap with legacy systems is crucial. The DRA Extended resource feature allows users to request resources via traditional extended resources on a Pod. This allows for a gradual transition to DRA, meaning cluster operators can migrate clusters to DRA but let application developers adopt the ResourceClaim API on their own schedule.
Partitionable devices (beta)
Hardware accelerators are powerful, and sometimes a single workload doesn't need an entire device. The Partitionable devices feature, provides native DRA support for dynamically carving physical hardware into smaller, logical instances (such as Multi-Instance GPUs) based on workload demands. This allows administrators to safely and efficiently share expensive accelerators across multiple Pods.
Device taints (beta)
Just as you can taint a Kubernetes Node, you can apply taints directly to specific DRA devices. Device taints and tolerations empower cluster administrators to manage hardware more effectively. You can taint faulty devices to prevent them from being allocated to standard claims, or reserve specific hardware for dedicated teams, specialized workloads, and experiments. Ultimately, only Pods with matching tolerations are permitted to claim these tainted devices.
Device binding conditions (beta)
To improve scheduling reliability, the Kubernetes scheduler can use the Binding conditions feature to delay committing a Pod to a Node until its required external resources—such as attachable devices or FPGAs—are fully prepared. By explicitly modeling resource readiness, this prevents premature assignments that can lead to Pod failures, ensuring a much more robust and predictable deployment process.
Resource health status (beta)
Knowing when a device has failed or become unhealthy is critical for workloads running on specialized hardware. With Resource health status, Kubernetes expose device health information directly in the Pod status, giving users and controllers crucial visibility to quickly identify and react to hardware failures. The feature includes support for human-readable health status messages, making it significantly easier to diagnose issues without the need to dive into complex driver logs.
New Features
Beyond stabilizing existing capabilities, v1.36 introduces foundational new features that expand what DRA can do. These are alpha features, so they are behind feature gates that are disabled by default.
ResourceClaim support for workloads
To optimize large-scale AI/ML workloads that rely on strict topological scheduling, the ResourceClaim support for workloads feature enables Kubernetes to seamlessly manage shared resources across massive sets of Pods. By associating ResourceClaims or ResourceClaimTemplates with PodGroups, this feature eliminates previous scaling bottlenecks, such as the limit on the number of pods that can share a claim, and removes the burden of manual claim management from specialized orchestrators.
Node allocatable resources
Why should DRA only be for external accelerators? In v1.36, we are introducing the first iteration of using the DRA APIs to manage node allocatable infrastructure resources (like CPU and memory). By bringing CPU and memory allocation under the DRA umbrella with the DRA Node allocatable resources feature, users can leverage DRA's advanced placement, NUMA-awareness, and prioritization semantics for standard compute resources, paving the way for incredibly fine-grained performance tuning.
DRA resource availability visibility
One of the most requested features from cluster administrators has been better visibility
into hardware capacity. The new
Resource pool status
feature allows you to query the availability of devices in DRA resource pools. By creating a
ResourcePoolStatusRequest object, you get a point-in-time snapshot of device counts
— total, allocated, available, and unavailable — for each pool managed by a given
driver. This enables better integration with dashboards and capacity planning tools.
List types for attributes
ResourceClaim constraint evaluation has changed to work better with scalar
and list values:
matchAttribute now checks for a non-empty intersection, and
distinctAttribute checks for pairwise disjoint values.
An includes() function in CEL has also been introduced,
that lets device selectors keep working more easily when an attribute
changes between scalar and list representations.
(The includes() function is only available in DRA
contexts for expression evaluation).
Deterministic device selection
The Kubernetes scheduler has been updated to evaluate devices using lexicographical ordering based on resource pool and ResourceSlice names. This change empowers drivers to proactively influence the scheduling process, leading to improved throughput and more optimal scheduling decisions. The ResourceSlice controller toolkit automatically generates names that reflect the exact device ordering specified by the driver author.
Discoverable device metadata in containers
Workloads running on nodes with DRA devices often need to discover details about their allocated devices, such as PCI bus addresses or network interface configuration, without querying the Kubernetes API. With Device metadata, Kubernetes defines a standard protocol for how DRA drivers expose device attributes to containers as versioned JSON files at well-known paths. Drivers built with the DRA kubelet plugin library get this behavior transparently; they just provide the metadata and the library handles file layout, CDI bind-mounts, versioning, and lifecycle. This gives applications a consistent, driver-independent way to discover and consume device metadata, eliminating the need for custom controllers or looking up ResourceSlice objects to get metadata via attributes.
What’s next?
This release introduced a wealth of new Dynamic Resource Allocation (DRA) features, and the momentum is only building. As we look ahead, our roadmap focuses on maturing existing features toward beta and stable releases while hardening DRA’s performance, scalability, and reliability. A key priority over the coming cycles will be deep integration with workload aware and topology aware scheduling.
A big goal for us is to migrate users from Device Plugin to DRA, and we want you involved. Whether you are currently maintaining a driver or are just beginning to explore the possibilities, your input is vital. Partner with us to shape the next generation of resource management. Reach out today to collaborate on development, share feedback, or start building your first DRA driver.
Getting involved
A good starting point is joining the WG Device Management Slack channel and meetings, which happen at Americas/EMEA and EMEA/APAC friendly time slots.
Not all enhancement ideas are tracked as issues yet, so come talk to us if you want to help or have some ideas yourself! We have work to do at all levels, from difficult core changes to usability enhancements in kubectl, which could be picked up by newcomers.
GKE Turns 10 Hackathon, with Amie Wei
Amie Wei is a Sr. Solutions Engineer at HashiCorp and was the winner of last year's GKE Turns 10 Hackathon. It was Amie's first time entering a hackathon and she ended up bringing the prize home with a Cart-To-Kitchen AI Assistant.
Do you have something cool to share? Some questions? Let us know:
- web: kubernetespodcast.com
- mail: [email protected]
- twitter: @kubernetespod
- bluesky: @kubernetespodcast.com
News of the week Links from the interview